


Joan Atwood -Artist| Educator | Crafter | Project Inspiration
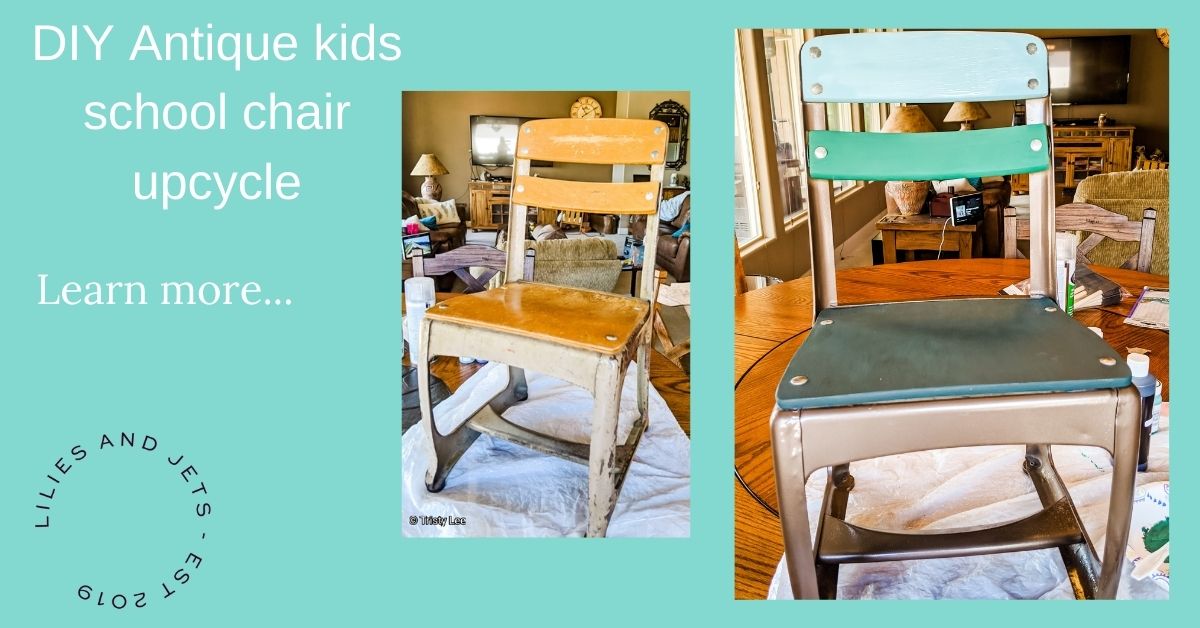
Nostalgia is a real good motivator and source of inspiration. While cleaning out my mom’s house, I ran across a child’s small wooden chair. My mother taught kindergarten in our basement before kindergarten was a staple at elementary schools. Finding this chair gave me then inspiration for a DIY antique kids chair upcycle project.

Incorporating memories into your DECOR:
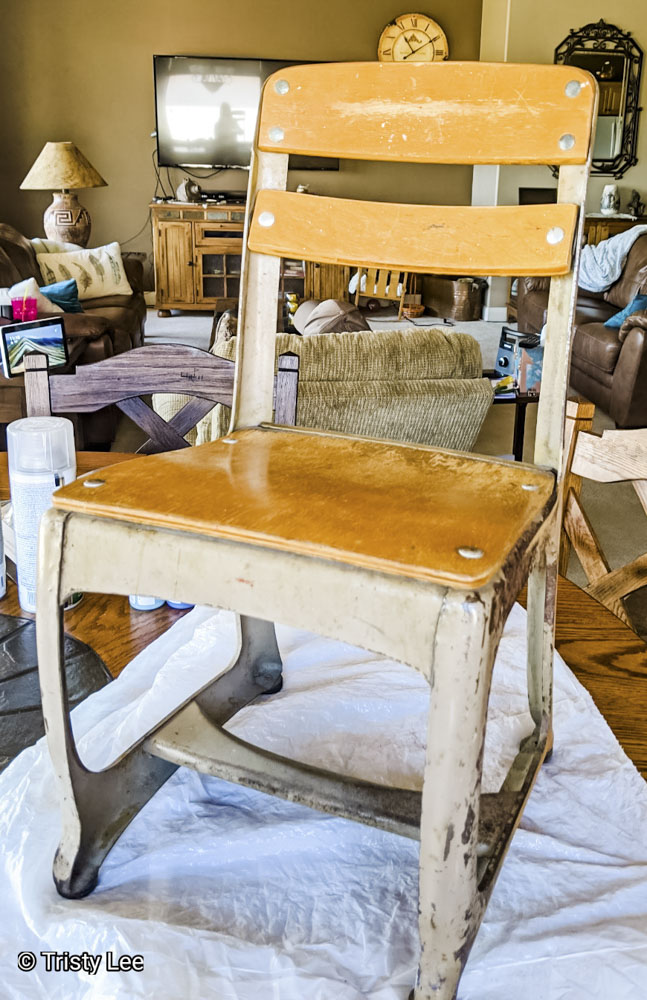
I remembered how my sisters and I would clean up the basement each afternoon after attending elementary school and junior high. At the time, I didn’t think that was much fun, but now I appreciate the lessons that I learned, like working hard to accomplish a task and education is essential. In any case, this little rusted, discarded chair was just too sweet to throw away. This antique school chair was going to be the perfect DIY.
Since I am lucky enough to have a three-year-old granddaughter, this provides an excellent opportunity to share some of my story with Lily and her mother, Tristy, as well as restoring the usefulness of this cute little chair. This kindergarten chair is the perfect size for Lily to use to eat, do some reading, drawing, and to have “tea parties.”
Upcycle project planning:
One of the hardest decisions in doing a project is deciding what you want the final project to look like. Color plays a vital role in that decision, as well as function. I want to have a color that compliments the room that it will be used in. In this case, I will choose graduated teal tones to accentuate the slate color in my other furniture pieces. When deciding to do a DIY project take a look at DIY I love it but, can i do it and to get a copy of our Project Planning Guide.
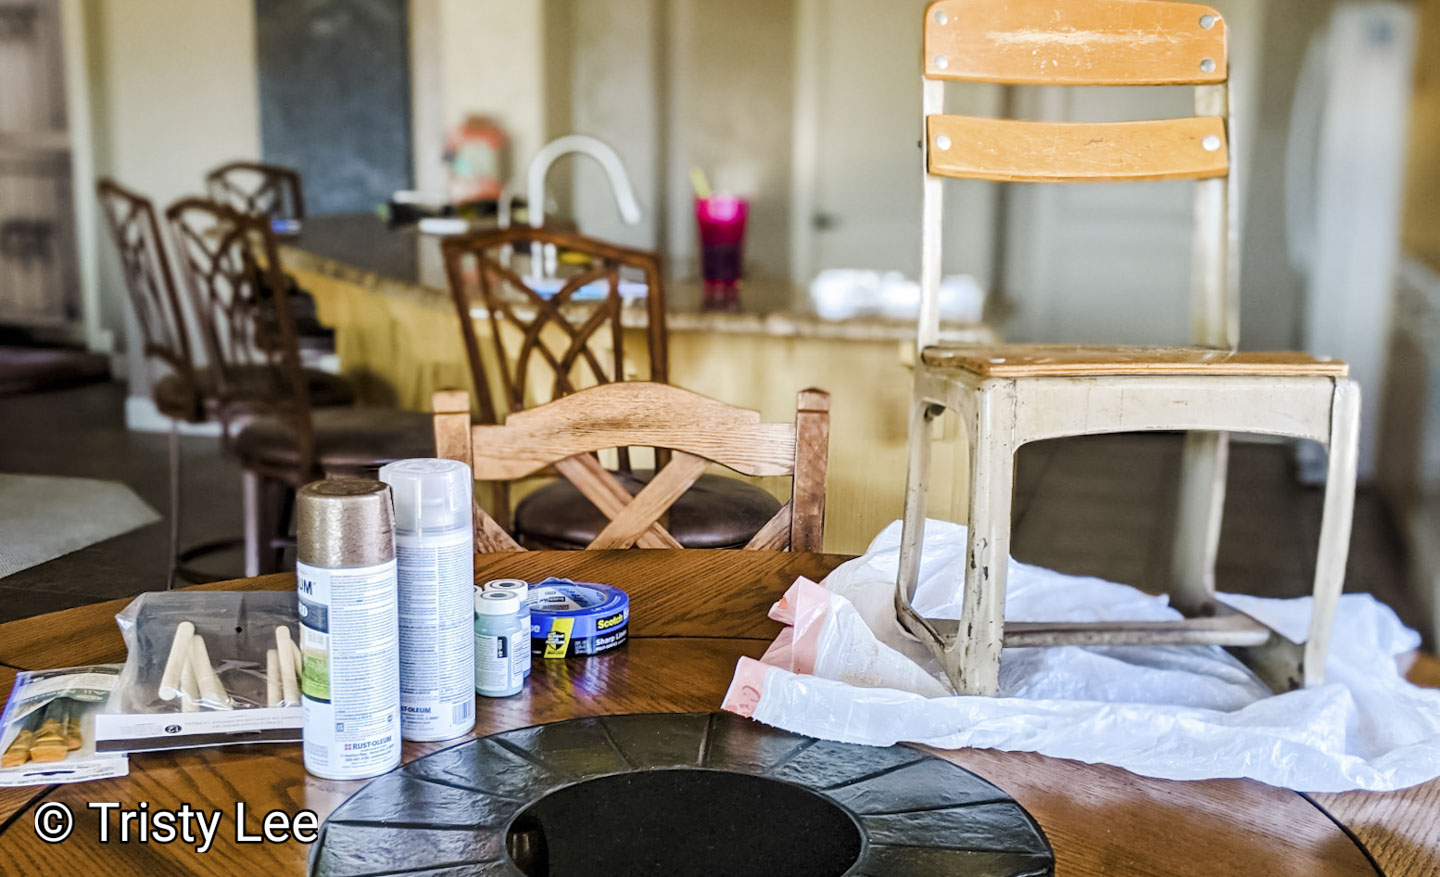
Upcycling Supplies needed:
• Small kids school chair
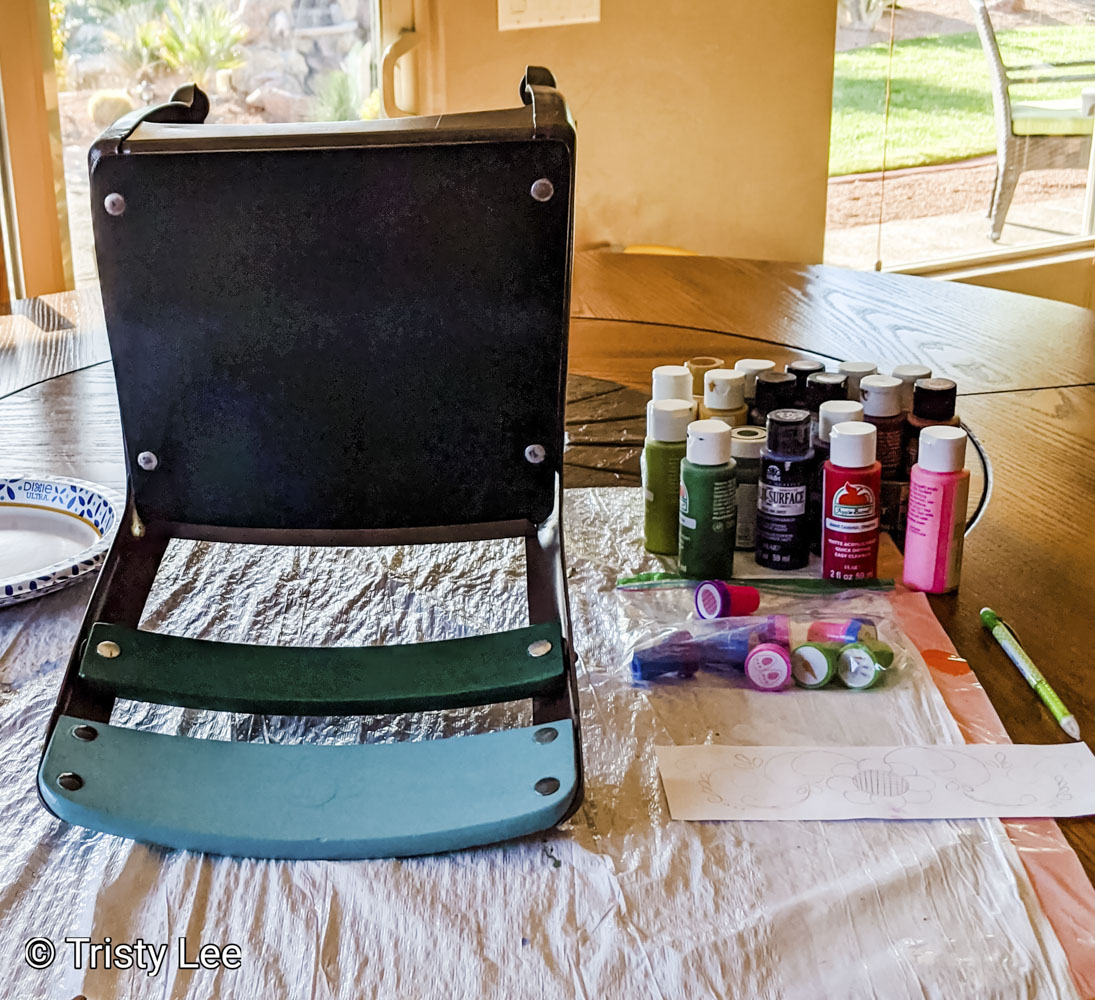
• Acrylic paint in your desired color (I used teal and mixed black paint in it for the deep color and luckily got a lighter shade for the top. You can just add white paint to get a lighter shade, as well.)
• Paintbrushes in various sizes
• Spray paint for the metal base (Any metallic color will work. I really like Rust-o-lum and have good luck with it.)
• Clear lacquer spray paint to seal your paint
• Painter’s tape
• Sandpaper block
• Cover cloth or plastic
• Rags for wiping away sand block remains on the chair
Newspaper for covering the wood parts of the chair while painting the metal areas.

How to start your chair upcycle:
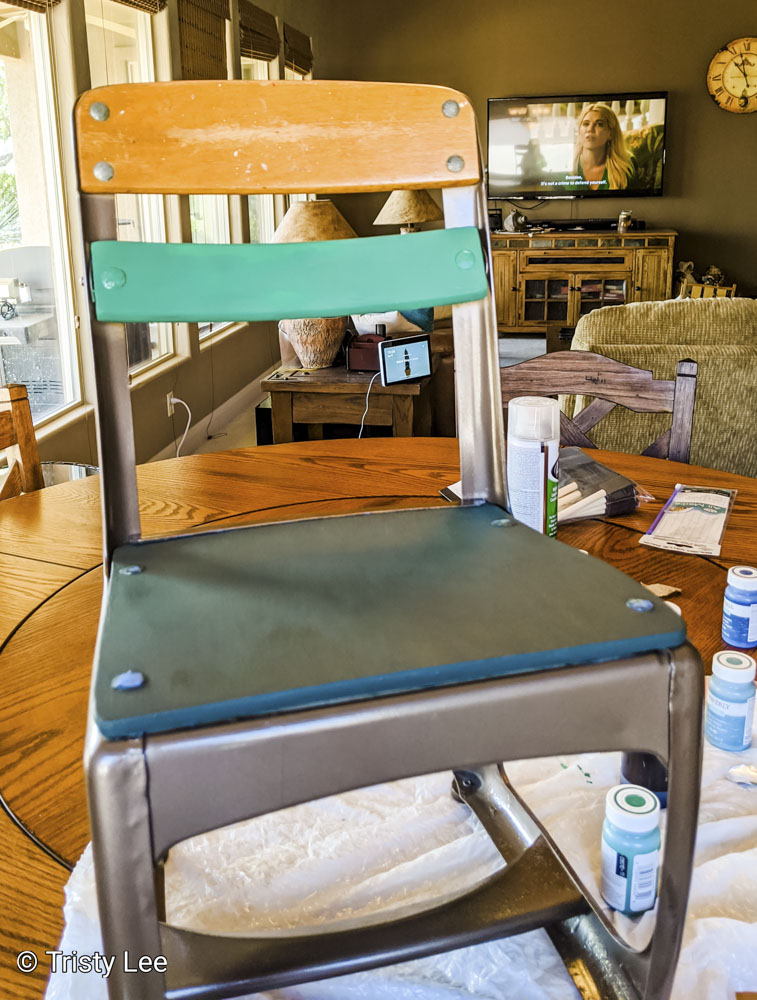
1. Start off by using the sandpaper block to sand down both the wood and metal parts of the chair. Keep going until all the loose paint and/or rust is gone. Then wipe down the chair to remove the paint/rust particles.
2. Then cover the wood parts of the chair, using newspaper and painter’s tape to prepare it for spray painting.
3. Next, spray paint the metal parts of the chair using the metallic spray paint. Use light coats and allow for drying time before applying the next layer. I did three coats.
4. After all the spray paint is dry (I let it dry thoroughly overnight), you are ready to paint the wood parts. You can use the tape on the metal to prevent spillage on it if you’re not sure of your painting skills. I chose not to cover the metal parts since I have experience in painting.
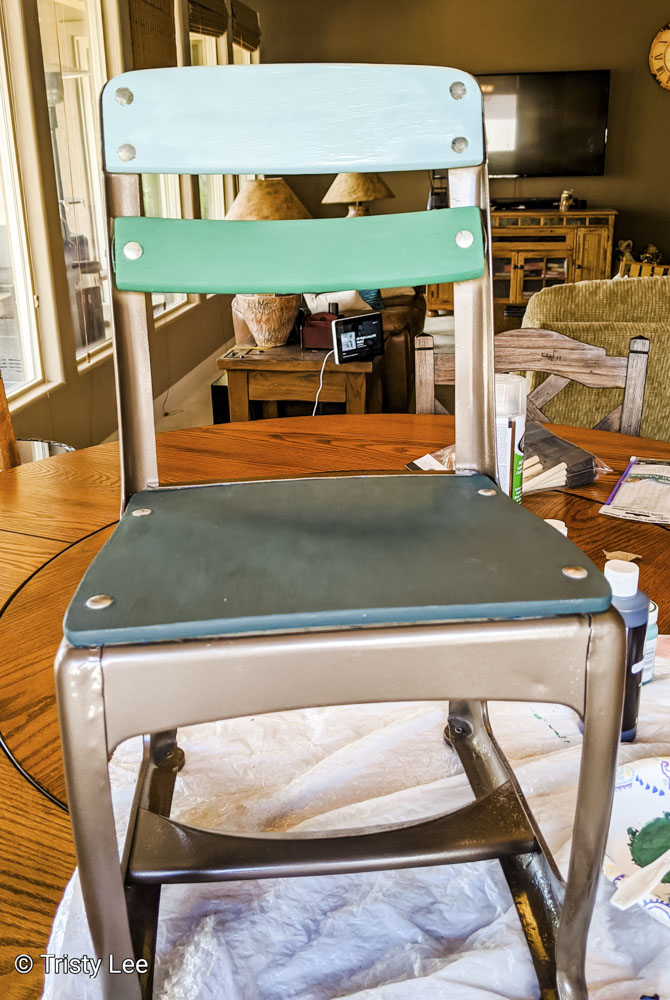
5. Start with the seat and use the darkest color there. My theory is that it would probably get the most wear and abuse from a three-year-old, so go dark so it won’t show as much. After it is dry, apply a second coat. After the seat is dry, move to the next wood section and do the same, using a lighter shade. Remember to let it dry thoroughly between coats and apply two coats of paint. Then move to the final section of wood using the same procedure.
6. Let the painted chair dry overnight. Then apply the clear lacquer spray paint coats. Light coats work best. I find three layers work best to make sure it is easy to wipe clean. Lily already put this to test. She drew with pencil on the top wood section, and it wiped right off.
Rejoice! Your DIY Kids School Chair upcycle is complete.
Put the chair to use:
I have to admit this project gave me satisfaction when Lily asked me to paint her table to match. She obviously likes her school chair. So now I need to look for a children’s table, since she is currently using our outdoor patio table, and I don’t want to paint it.
See how one project leads to another?
Great, right?
If you try a project similar to this we would love to see your results. Make sure stay up to date on our projects by following us on Facebook.
About the Author

Joan Atwood has over 30 years of experience in education, working as an elementary supervisor, principal, and teacher, teaching a wide range of grade school children, as well as university classes. Her expertise includes kindergarten, elementary education, and gifted/talented. She is an artist with expertise in oil painting and floral arranging. She enjoys crafting with her grandchildren, wire wrapping pendants, and long walks in nature.


+ show Comments
- Hide Comments
add a comment