


Tristy Lee- DIY | Home Decor | Art | Project Inspiration
Are you looking for a unique Halloween Party idea? What about adding a DIY to the mix or having it be the reason for the party. I am always looking for project ideas that the whole family or friends will have fun doing. We were planning a long weekend getaway mom, Joan Atwood, and her sister Janet Hazleton.
We always have a great time when we get together. You can pretty much pick out any project you want to do, and Joan and Janet are game to give it a shot. Over the last couple of years, we have been building up a collection of witches supplies to decorate with at Halloween. We decided that DIY Witches Books Party should be a highlight on the list.
PROJECT INSPIRATION:
We did some of these a few years ago with my Grandma Craig, my mom, and her siblings. They were a highlight of my décor for the next couple of years. We, unfortunately, we lost them in flood, so it was time to create some more. This project was fun for all ages and skill levels with crafting, so we decided it would be a great time to share with craft with our cousins. Two of Janet’s daughters were with us for this project, Teina Hazelton and Janae Briggs.
WITCH SPELLBOOK SUPPLIES:
To prep for the book party, Janet, Joan, and I started by raiding our craft closets for Halloween supplies that we have collected over the years.
Scrapbook paper in the right colors and remnant spiders, dragon eyes, and skeletons were all in the mix. We stopped at a couple of places in St. George, UT, to gather additional supplies. Michaels craft store was a fun stop, and we found some large dragon eyes that several people incorporated into their books. We picked up some metallic acrylic paints, including a dramatic purple. We also found a few small bats. We stopped at our local Restore to pick up the base books. We looked for large coffee table style books with exciting shapes.
- Books: We choose books that were hardbound with unique sizes and depths. Thrift stores are a great place to look for these.
Coffee Table Books, Dictionaries, and cookbooks are good candidates. Fair warning we always get distracted with the cookbooks looking at possible menu options. - Mod Podge: This is a great option to adhere to texture to your books.
- Painters Tape: This option to cover the books to add texture is good for little ones where patience to get to the next step is limited.
- Paper Towels/ Toilet Paper: Breaking pieces off and adhering with mod podge was a favorite option for creating texture on the books.
- Paints: Acrylic paints/ Spray paints: Both of these are good options, and layering of colors can add to the look of age and depth to the books.
- Glue Gun: Using a hot glue gun will help you secure your embellishments to the books. You can also use it to create letters or draw simplistic shapes like snakes before painting your book.
- Embellishments: Layering some of the larger items under the layer of paper towels can help them look like they belong to the book’s texture. Using a larger item like the dragon eyes or a plastic skull is a great option. We also used tin foil to sculpt around the dragon’s eyes. You can paint smaller items like plastic snakes and glue them on to create patterns. You can have fun here using supplies like stickers, scrapbooking supplies, and Janet even brought these metal script words that looked great on the books.
HOW-TO VIDEO:
While we discussed the basics that we learned from the last time we had a witches shoe party, people quickly started down unique paths. We wanted to share the process and ideas with you, so we created a video tutorial to walk you through our shoes’ creation.
HOW TO MAKE WITCHES SPELLBOOKS:
- Start by prepping your space: Cover your workspace and put down drop cloths.
- Then create a supply area: Use one space for your supplies, paintbrushes, paints, Mod Podge, and embellishments. Having a supply area will help your partiers easily find what they need to progress through the project.
- Next, pick a book: Select the book you want to use for the project, think about the size and where you want to display it.
- After that, you have the option to age the book pages and edges: Water is an excellent option for aging the pages of the book. Adding some color to the water, brown or black, also helps to age the page edges.
- Then, you decide how you want to add texture to the book. You can use painters tape layering it on in pieces or tear paper towels or toilet paper into pieces to Mod Podge onto the book. Make sure you give it time to dry before moving to paint.
- Before you move onto the painting, you need to decide if you will embed anything under the paint. For example, we attached a skull before painting. For the dragon eye, I decided to embed it after painting the base layer so that I didn’t have to cover the eye.
- Paint option, You can use layers of acrylic, adding layer after layer. You can play with the paint using layers wet will mix and blend the colors, allowing it to dry will give you a cleaner color distinction. Spray paint is a great option to get the color on quickly, and using light layers will provide you with unique color options and coatings.
- Adding embellishments will give you the final details to finish the look. We primarily used a glue gun to attach our embellishments.
FINISHED WITCHES SPELLBOOKS:
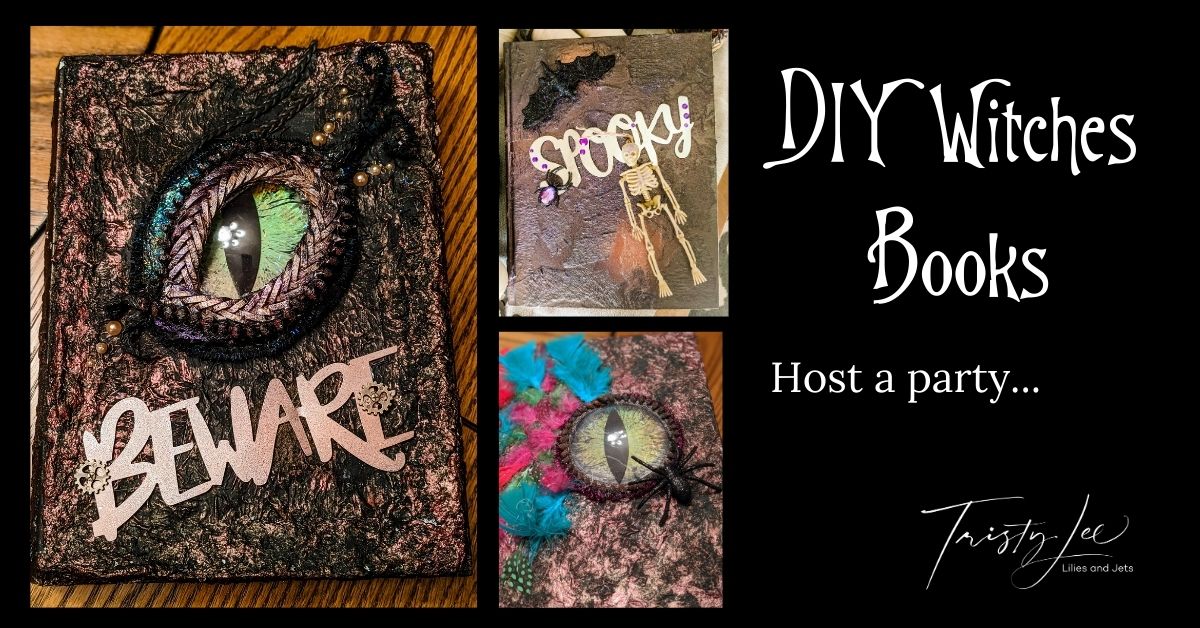
Dragon Eye Beware:
Janet Hazelton embedded a dragon eye into this book using some braided leather strands in layers, coordinating glitter and pearls. She added a metal Beware cut out. This book turned out perfect. The shape of the eye she created looks like the dragon is peaking out, ready to blink.
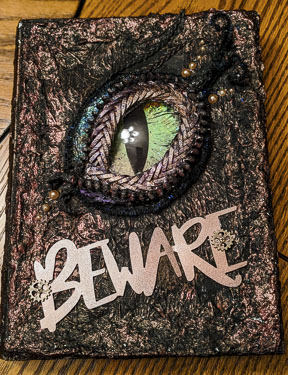
Dragon Eye Feathers
Janae Briggs added some fancy flair to her dragon eye book. She used a leather braid around the eye and added a spider to finish it off. She started with a base layer of black paint then a purple metallic paint over the top. This party witches’ book will not scare any of the little ones in the house.
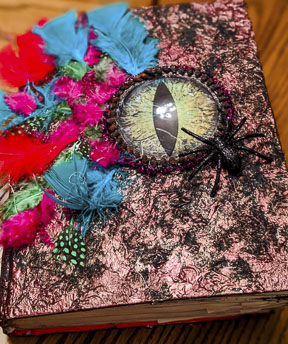
Dragon Eye
I did this book to coordinate with the dragon shoe that I created during our Witches Shoe Party. I used many of the same techniques used on the shoe, using aluminum foil to sculpt around the eye, and I used the same spray paint technique to layer the colors on top.
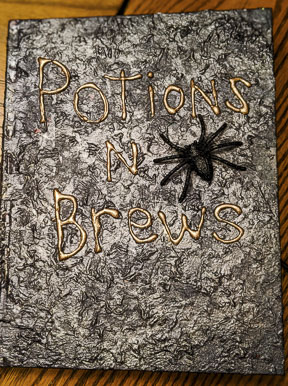
Potions and Brews Spellbook
Teina Hazleton did a classic version of the witches’ book. The colors she chooses for her book shout creepy. Teina created a black base then used a bronze metallic overlay. Next, she uses hot glue for her lettering then painted over it with gold paint. The spider gives it a finishing touch.
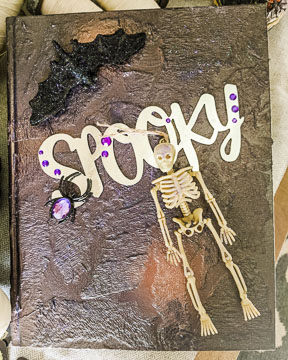
Spooky Spellbook
Joan Atwood did this Spooky book. She aged the pages in the book using water on the pages. Joan covered her book with paper towel pieces and Mod Podge. She used spray paint to cover the book with a blue base and highlights of rose gold and rubbed oil black. For embellishments, she used a spooky metal sign and a small skeleton.
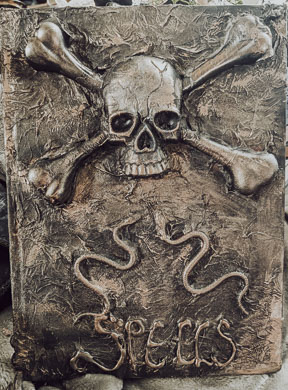
Skull Spellbook
I did this book using a plastic skull piece I found at the dollar store. I glued it on then used toilet paper and Mod Podge to make it look embedded into the book. I glued on a couple of plastic snakes and did lettering out of hot glue.
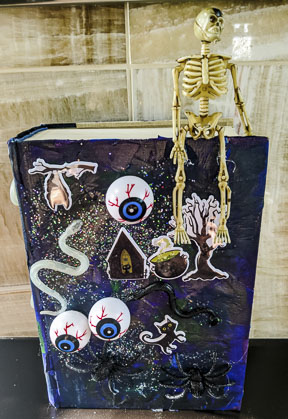
Crazy Eye Spellbook
Lily Lee our 3-year-old was so excited when she saw the spell books we created and wanted to make one of her own. I had a couple of leftover books. To adapt this for her, I knew I needed an option to cut down the time it took to age the book with toilet paper or paper towels that process takes an hour or so. I knew she would not have the patience for it. After thinking about it for a bit, I thought about using painter’s tape in strips. Grandma Joan helped Lily through the entire process in two sessions with a total time of just over an hour. Lily helped to apply the tape, and then she did the painting using colors she picked. (Make sure you cover your workspace and kid’s clothing.) For the embellishments, we let Lily pick them and show us where to put them. We used hot glue, so we put that on and put them where she directed us. She was so excited about her book that anyone who comes into the house she takes them to her room to show them off.
HOSTING A DIY HALLOWEEN WITCH BOOK PARTY:
Take some time this Halloween to host this type of party, and you will be talking about it for years. You have also created elements of home décor that will have memories for everyone attached to it. My Grandma Craig passed earlier this year, and thinking back on this project with her brings a smile to my face every time I look at the books. There is no way to do this project wrong, so get your little witches together and have some party.
Telling your story in your home:
Make sure you grab your Free Guide to Project Planning. We are always working on new DIY and Home Décor projects. Follow us on Instagram for previews and behind the scenes access to all things Lilies and Jets.


+ show Comments
- Hide Comments
add a comment