


Tristy Lee- DIY | Home Decor | Art | Project Inspiration
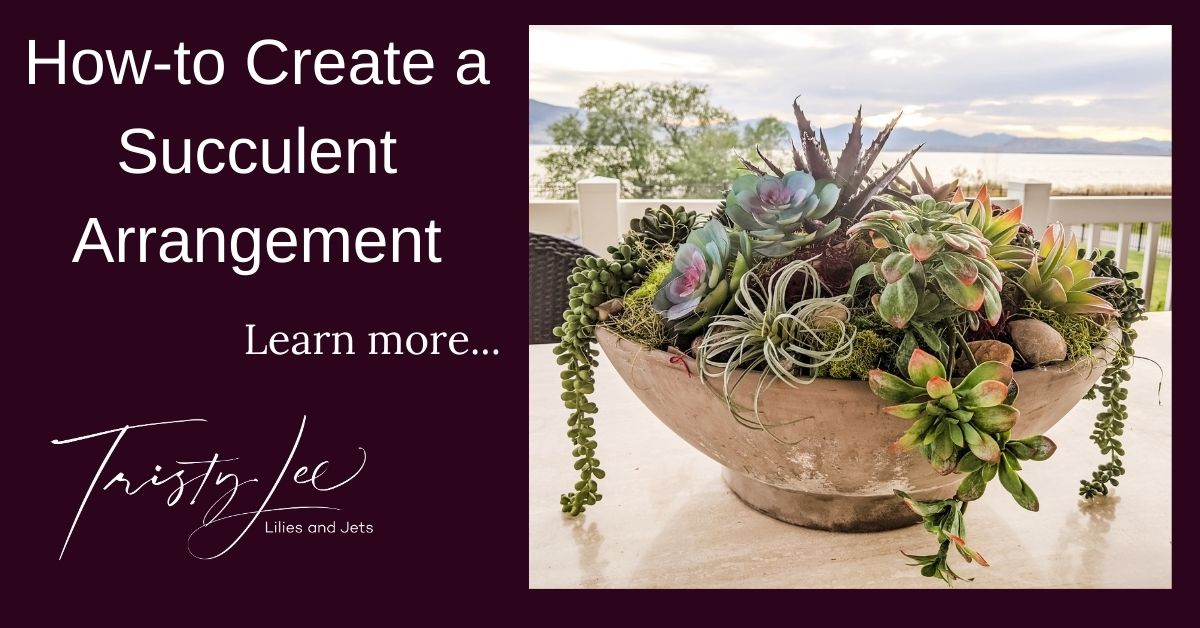
I am not very well known for keeping plants alive. I love the look of plants and flowers throughout my yard and home. A few years ago, I created a live succulent planter for the dining table on my deck. I kept it alive for a few years; however, I forgot to bring it into the house last winter, and it froze. We enjoy eating at that table, and I quickly missed having the plants on the table. I decided it was time to create a new succulent arrangement, but this time I decided to use artificial succulents. It was a great time to show you how to create a succulent arrangement.
Arrangement Inspiration:
Over the last few years, the artificial succulents that are available look so real. After seeing them, I quickly realized I could get a wider variety of artificial plants and have the benefits of not worrying about watering them or freezing them. I like the modern, clean feel of succulent arrangements. They have a simple elegance that I knew would work through the entire warm season that we use our table

Arrangement Supplies:
• Large round cement container
• Filler for the base of cement bowl (We used plastic grocery bags and rocks)
• Sahara Floral Foam- Semi-circle and square
• Moss
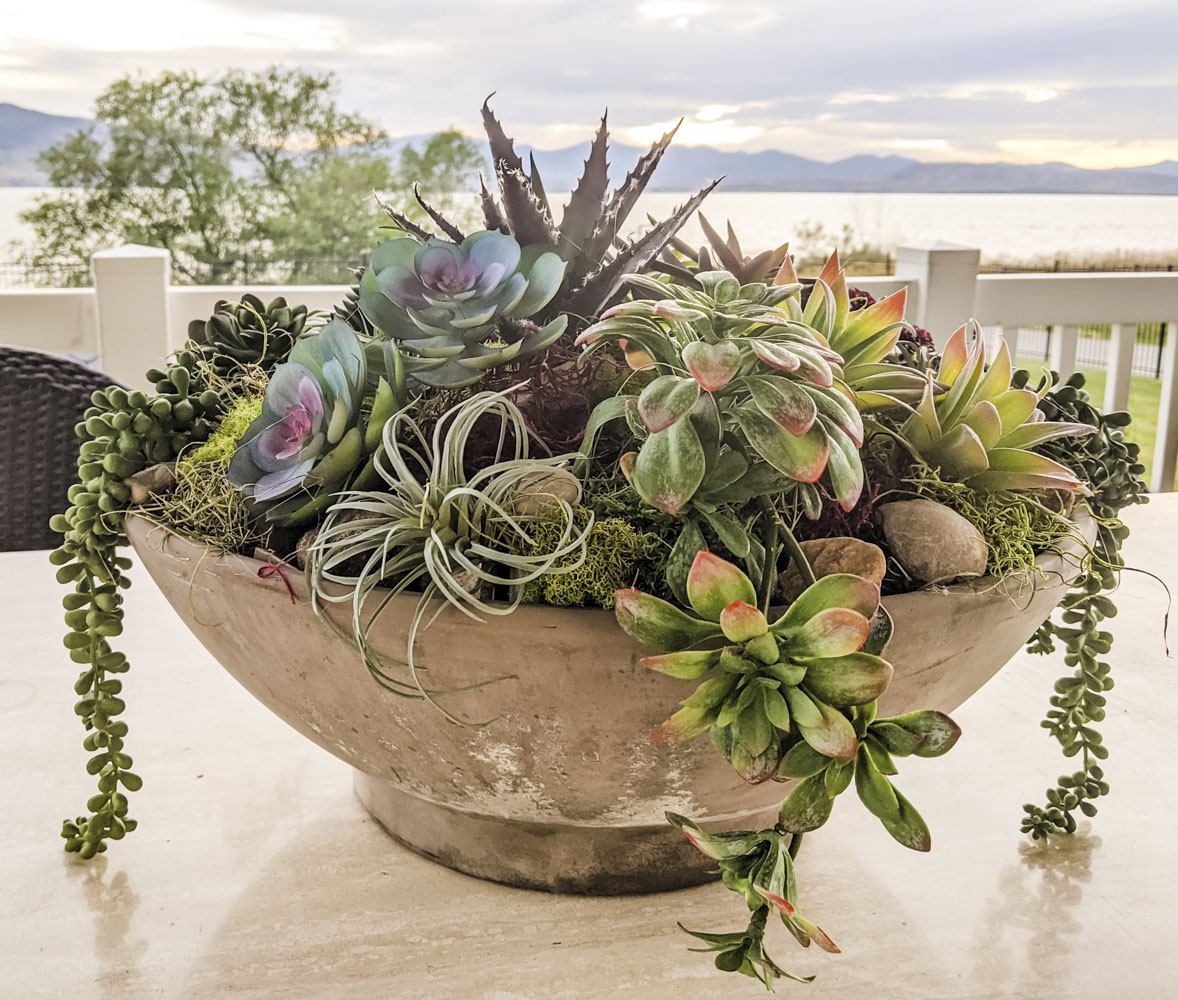
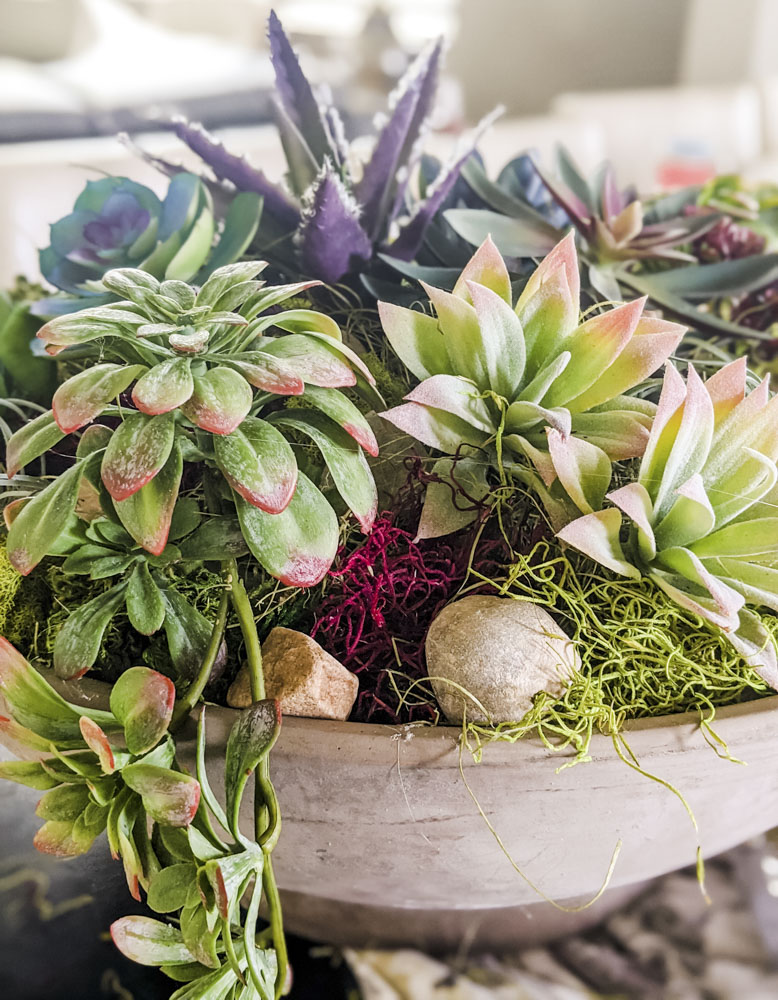
• A mixture of Succulent Plant’s selects a variety of sizes our cement bowl was 14″ across.
• Wood Glue
• Filler for the base: We used plastic grocery bags
• Hot Glue Gun
• Hot Glue three large succulents as single plants to put in the middle
• Eight medium succulents (4 unique styles two of each)
• Four small filler succulents
• Five creeping succulents to drape over the edges of the arrangement
How-to create succulent Arrangement:
Building the base for your Arrangement :
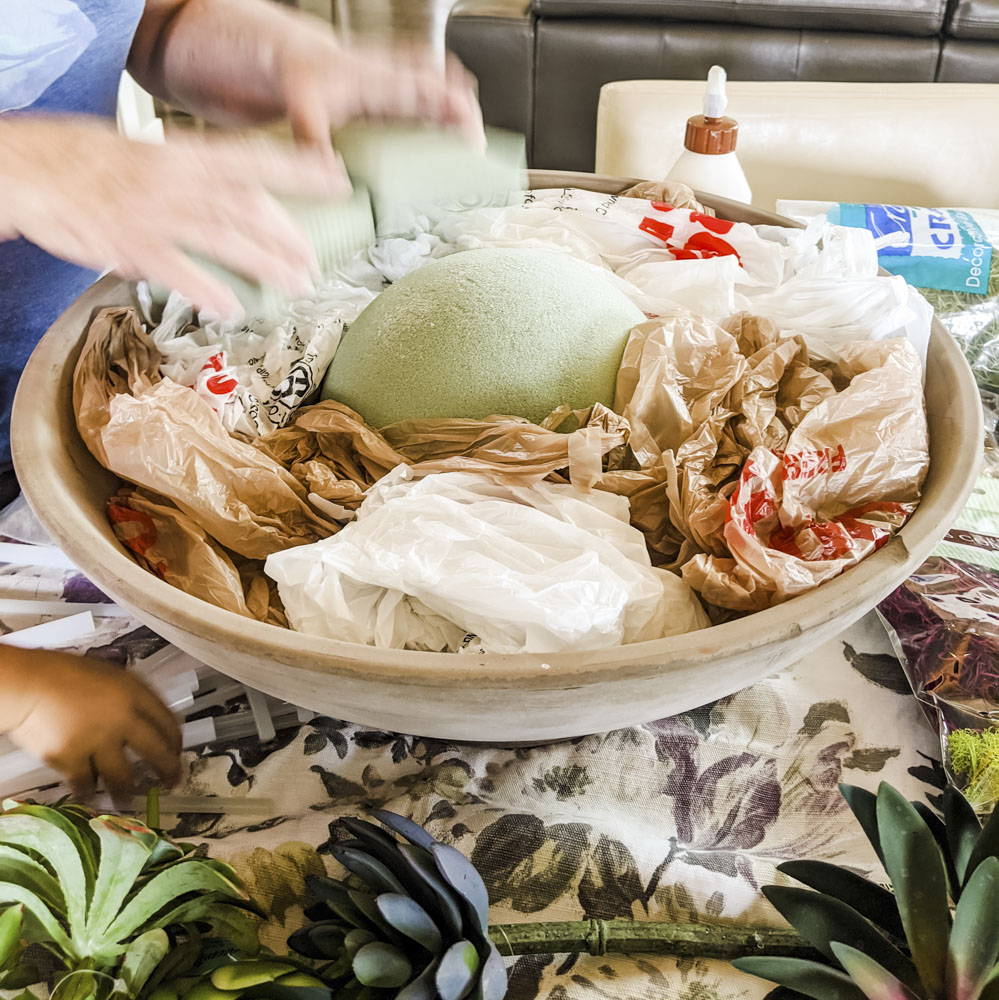
1. To start, gather all of your supplies and protect your workspace before starting
2. Then we selected a container we used a large cement bowl. You have a couple of options here. You could fill the entire bowl with Sahara, or you can fill the bowl with some filler then add a minimum of 2″ layer of to the top of the container.
3. After, create the Sahara foam base in the bowl. We built up the container using a couple of dishes and some plastic grocery bags. We used a heavy-duty to secure the dishes to the planter.
4. Next, you want to have a minimum of a 2″ layer of foam to attach the plants into the bowl. You can use a half circle for the middle then cut square foam to fill in the container.
test
Tip: If you plan to use the arrangement outside your container and filler should be very heavy to add stability to protect from wind. We used the cement bowl and still added rocks to the bowl.
The layout of the succulents:
1. Initially, we started with the draping succulents. We had five of them. We had 3 of one style 2 of another. We put them in evenly rotating the types around the bowl.
2. We used some hot glue on the end of the stems to secure them in the foam.
3. Next, we selected three unique large succulent plants to add to the center.
4. Then, this gave us a basic structure between each of the draping plants. There was a pie shape where we used two medium sizes of the same size in each section.
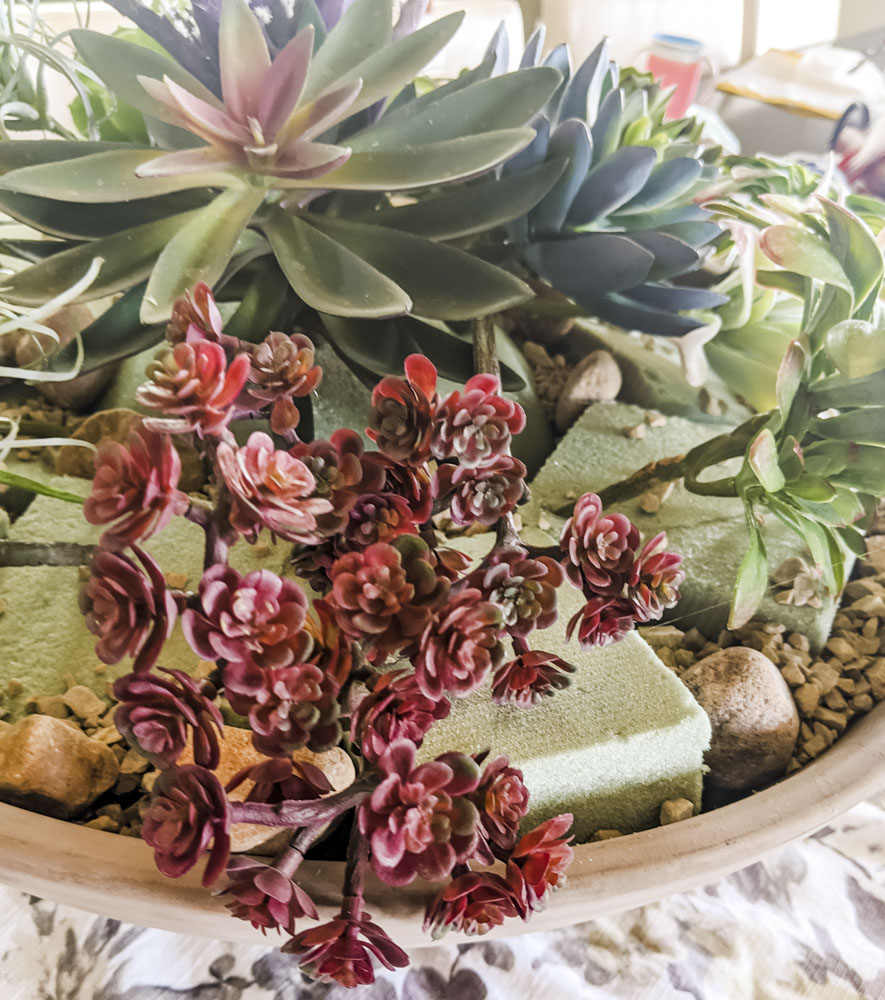
5. Finally, we added the smallest four succulents to some of the more significant gaps in the bowl.
Filling in the gaps in the arrangement:
1. Ultimately you want to ensure that the entire bowl is full. To add visual interest, we used hot glue to put in layers of moss. To add visual interest, we used multiple colors and textures of moss. Liberally apply the hot glue if you are going to put this outside to secure the moss from the wind.
2. Last, add additional visual interest by tucking in rocks. Place the stones under plants, on top of the moss, and peaking out from moss. The other rocks will help to secure the moss from the wind.
Building relationships though DIY projects:
I love doing crafts with my mom and daughter. As a child, I remember doing these types of projects with my mom helped build my confidence and creativity. The choices you make throughout the project and problems that come up that you have to solve are low-risk ways to teach life lessons.
You would think a 3-year old would quickly lose interest, but Lily loves helping out. We have to adjust what she can help with on each project. Sometimes it is holding something while we get ready, or picking the next plant, and even counting the right number of something. I highly encourage you to use these opportunities to build bonds with your little ones to last a lifetime.
Get more Lilies and Jets inspiration:
Make sure you grab your Free Guide to Project Planning. We are always working on new DIY and Home Décor projects. Follow us on Instagram for previews and behind the scenes access to all things Lilies and Jets.


+ show Comments
- Hide Comments
add a comment