


Tristy Lee– DIY | Art | Home Decor | Project Inspiration
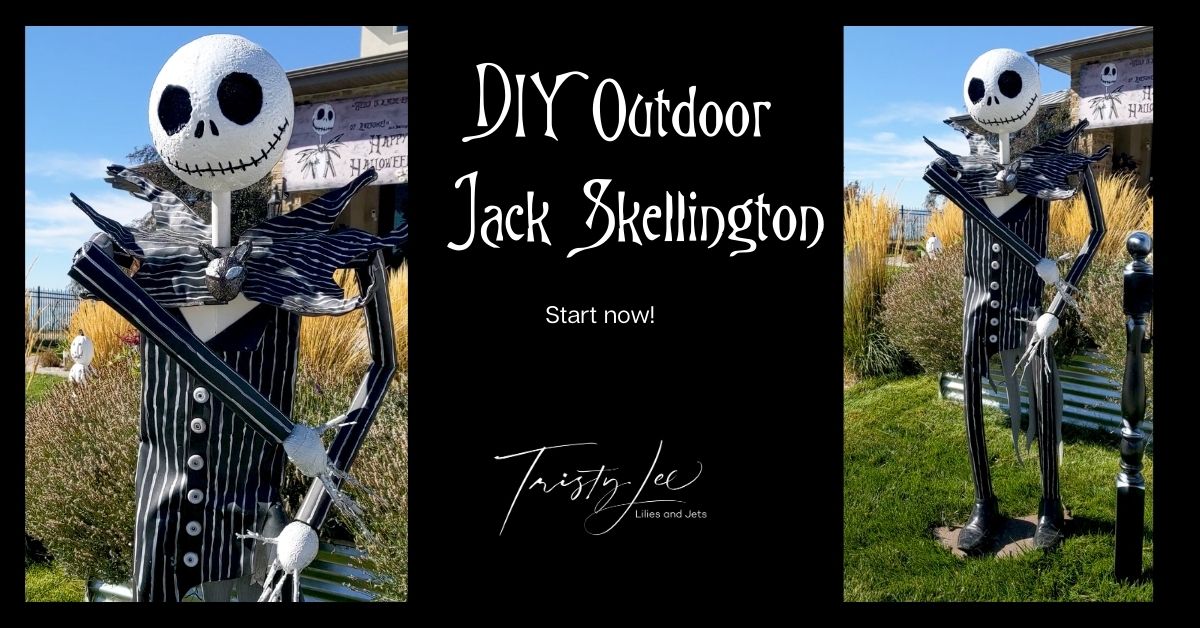
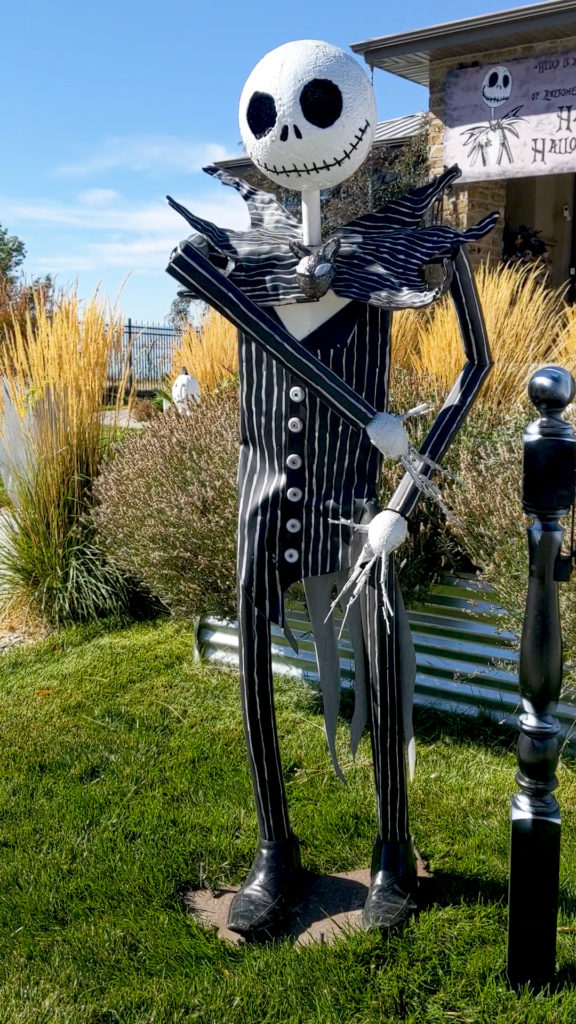
We are huge Tim Burton fans, and our favorite is the Nightmare Before Christmas movie. I have several pieces of Halloween Décor inspired by Jack Skellington. In our neighborhood, we are the Halloween House. In the last couple of years, we have been rebuilding our collection. We had a flood that ruined most of our décor. Jet likes to stop by the UVU surplus sale regularly, and he found two rebar sculptures that he brought home knowing we could figure out some way to use them in our Halloween Décor. The rebar statue was the foundation for our DIY Halloween Jack Skellington outdoor yard decor.
JACK SKELLINGTON INSPIRATION:
Jet brought home two rebar life-size figures of people. We started to brainstorm options, and we want to create an outdoor figure inspired by Jack Skellington. We knew it would be an adventure into the unknown since we had never built anything like it. I will say these sat in our yard for a couple of years until this year because we were unsure how to do the project and make it last. That is when Paul Emerson and told me about how he created his DIY Outdoor Yard Spider. When he describes using fiberglass to weatherproof the spider’s body, it was the inspiration that got us moving on our project to create a DIY Halloween Outdoor Jack Skellington.
HOW-TO CREATE DIY HALLOWEEN JACK SKELLINGTON INSPIRED YARD ART.
SUPPLIES FOR CREATING YOUR JACK SKELLINGTON YARD ART
• Epoxy
• Rebar stick-figure frame
• Pipe insulation
• Liquid Nails
• Black Men’s Shoes
• Acrylic Paint (Black and White)
• Styrofoam Ball
• Soldering Iron

How to create a DIY Halloween Inspired Jack Skellington:
JACK SKELLINGTON JACKET
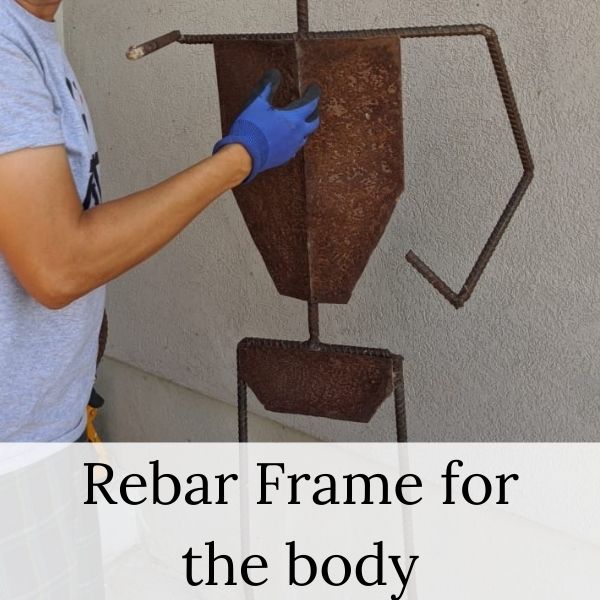
For this project, we started with a rebar pre-built skeletal frame. If you do not have this, you could build a structure out of pipes or some simple welding. Don’t shy away from this if you don’t know how to weld. It is a pretty easy project, and with a quick Facebook search, you might be able to find someone to build you a frame quickly.
1. Jet and I initially thought we were going to use black pipes to cover the legs and arms. When we went to Home Depot to look for options, we found some black pipe insulation and had seams that had removable tape to seal the foam together. The foam insulation tubes were ideal for cutting to length and quickly put around the rebar and attach.
2. Next, we use white acrylic paint to freehand stripes on the legs and arms.
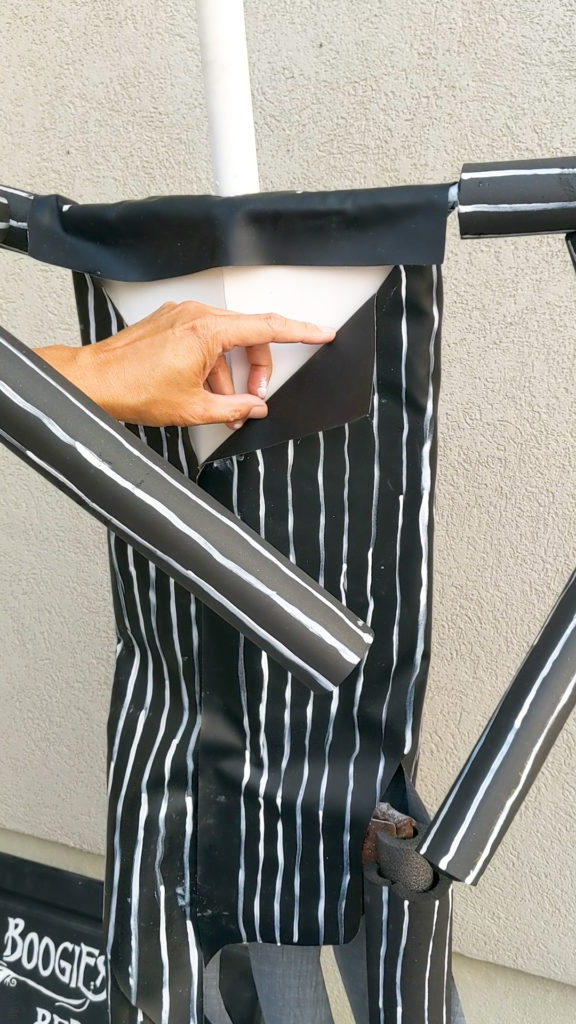
3. Then, we had a metal plate on the front for the chest piece. We painted white. If you don’t have this on for your frame, you could get a plastic part, cut it in a triangle or wood in a triangle, and apply paint white.
4. Next, we used liquid nails to glue a piece of foam to the triangle’s back to give his body some shape.
5. After that, we use cheap black vinyl. We cut a piece of vinyl large enough to go around the full body and long enough to go to Jack’s knees.
6. We started with about 2 inches cutting a hole through the vinyl. Then we placed the vinyl over the neck. That is where we began slipping the vinyl over the neck and used liquid nails to glue the vinyl to the shoulders.
7. Next, I free form cut the tails into the tuxedo shape in the back and
Use liquid nails to glue down the back of the coat to the foam.
8. Then, I wrapped the extra vinyl around to the front, cutting it at the shoulders to allow it to wrap around cleanly. I left the top portion open to create a jacket type feel and glue the vinyl down around the chest.
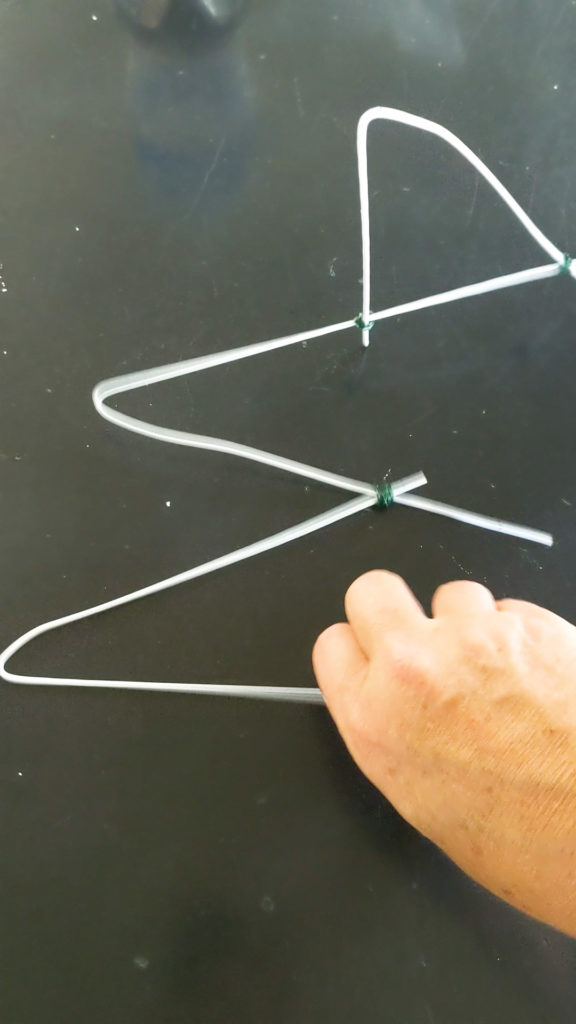
JACK SKELLINGTON BOWTIE:
Jack has an iconic bowtie with a bat in the center. I knew I wanted this to be bold and have a three-dimensional feel.
1. I started by looking at some pictures of the bowtie on line and started with a freeform sketch of one side.
2. I initially cut a pattern out of a garbage bag and held it up to check the sizing.
3. Then, I cut up some hangers to create a bendable frame to put in the collar’s middle.
4. After that, I used tin foil all around the wire hanger frame.
5. Then I cut four vinyl ones for top and bottom on both sides of the bow tie.
6. Then I used liquid nails to glue the vinyl to the top and bottom of both sides.
7. After that, I used white acrylic paint to add horizontal stripes.
8. To create the bat, I used a foam egg and cut it in half. Then I covered it in aluminum foil, and freeform made some ears and eyes. Then, I used some hot glue to attach them.
9. To attach the bowtie and bat, we used liquid nails and painter’s tape to hold it in place while it dried.
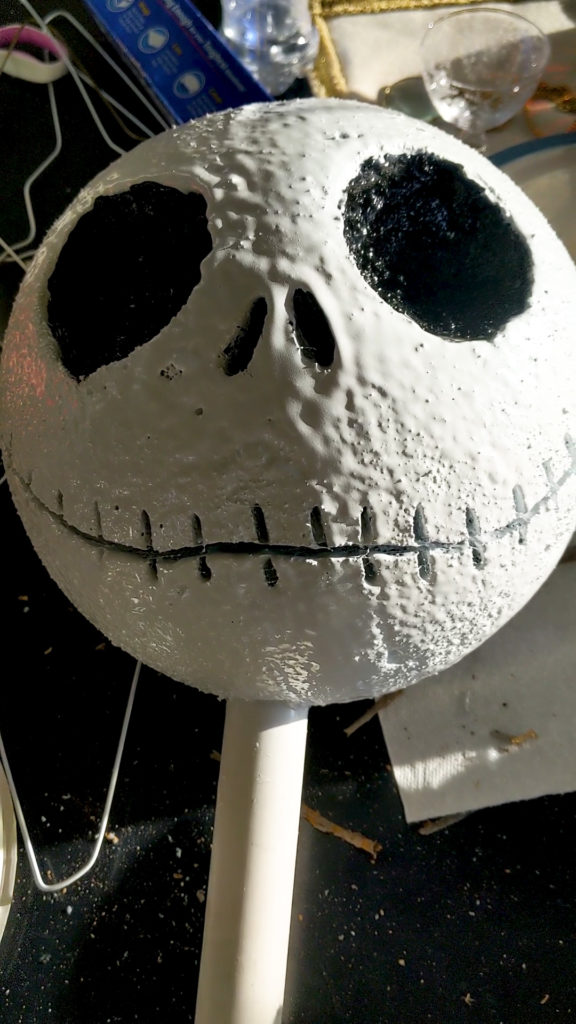
JACK SKELLINGTON HEAD:
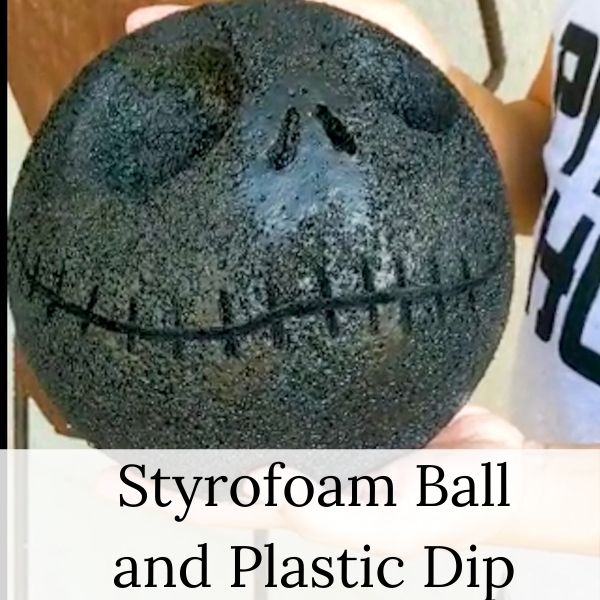
1. We started with a Styrofoam ball, and we sketched his eyes, nose, and mouth on the ball.
2. After that, we used a soldering iron to carve in the eyes, nose, and mouth.
3. Then we sprayed the ball with plastic dip, letting it dry and putting on a total of two coats. We did this because we didn’t want the epoxy to melt the Styrofoam when applied.
4. Next was the epoxy. We mixed it and used the arm of the rebar skeleton to hold it up. We applied two coats of epoxy.
5. Then we applied two coats of white exterior spray paint.
6. After that, I painted the eyes, nose, and mouth black using acrylic paints.
7. Lastly, we applied two coats of clear coat spray paint to the head.
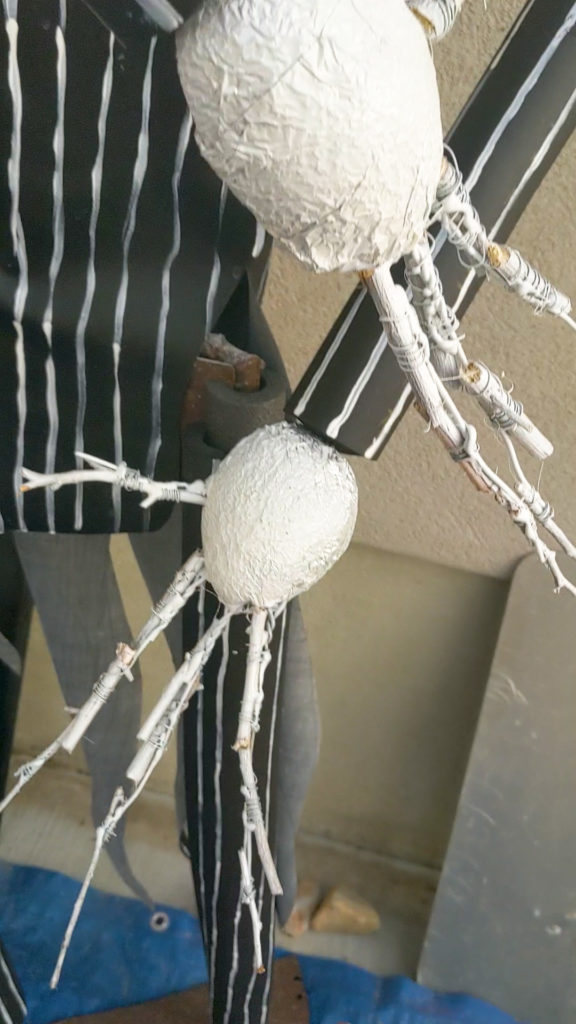
JACK SKELLINGTON HANDS:
1. I wanted to create a look of joints in his hands, similar to the Jack Skellington from the movie. To do this, I decided to use twigs from a tree branch.
2. I bought a plastic egg from the craft store and cut it in half to create both hands’ palms.
3. Next, I covered the plastic eggs with aluminum foil.
4. After that, I created the fingers and thumbs out of twigs broken and attached with thin floral wire. (Note: Jack only has three fingers and thumb)
5. To attach the fingers to the foam, I coated each finger’s wide end in hot glue and pushed it into the foam egg.
6. Then, I used a couple of white spray paint and a clear coat to finish off the hands.
7. Jet then carve into the egg to put a pipe into the hand to slip over the rebar.
8. He ultimately used liquid nails to secure the hands to the rebar.
JACK SKELLINGTON SHOES:
1. We selected a pair of Jet’s old dress shoes. He used a table saw to cut through the entire bottom of the shoe and then used scissors to cut through the shoe’s heel.
2. After he cut through it, he used liquid nails to attach it to the structure’s metal base and put it around the rebar.
TELLING YOUR STORY THROUGH DÉCOR:
Making things to display for the holidays is a great way to give your home decor instant memories and story. It is impossible to not think of loved ones and the fun times spent creating things together. Please share ideas and pictures of your Witch Shoes and how you display


+ show Comments
- Hide Comments
add a comment