


Tristy Lee- DIY | Home Decor | Art | Project Inspiration
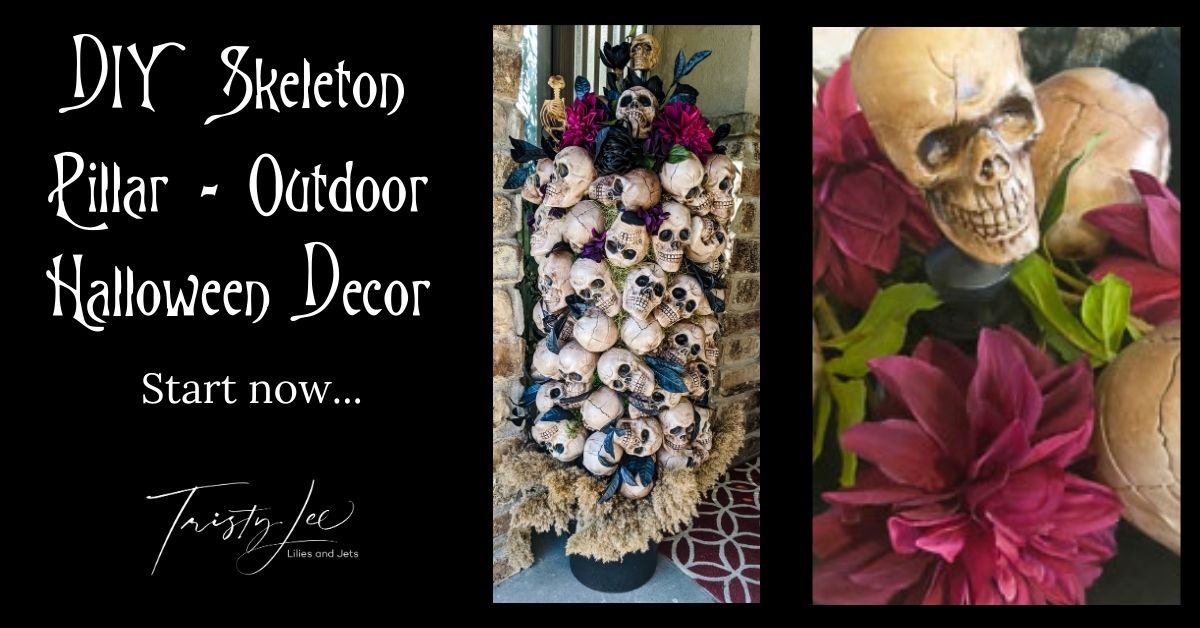
What do you do with 100 skeleton heads? Well, you create a DIY Halloween skeleton pillar, of course. Decorating for Halloween is a favorite at our house. We love to hear the comments as kids come up to the door to trick or treat. We frequently see kids posing for pictures with our outdoor décor, and we adore that people are enjoying our creations. How did we think of a Skeleton Pillar?
SKELETON PILLAR INSPIRATION:
Ohhhh, Pinterest, you get me in so much trouble. I need a few more months in the year for Halloween projects alone. I saw the arbor on Pinterest of skeleton heads immediately thought about how amazing my whole archway above my porch would look. I was 7 months pregnant when I went to the dollar store to buy skeleton heads. I found 100 skeleton heads and brought them home. I pitched the idea to Jet, and he said you’re crazy 100 skeleton heads won’t even get us started covering the entrance archway to the home. Three years later, I was downstairs looking through my Halloween décor options, and I found the heads. It was time to figure out a project for them.
Generating Ideas for the Skeleton heads:
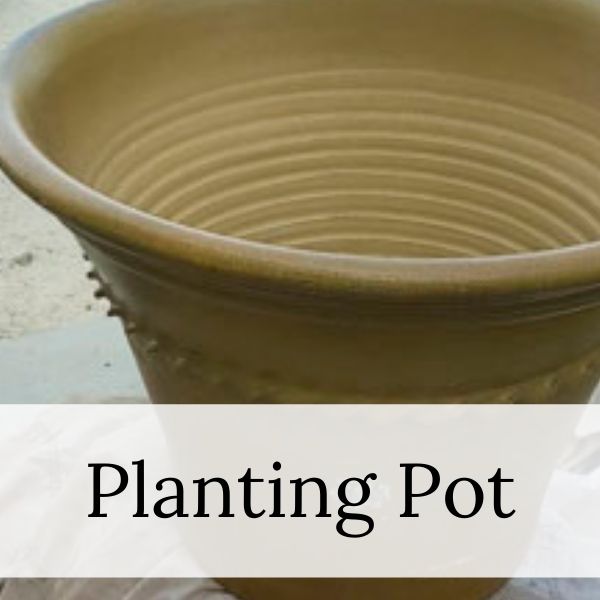
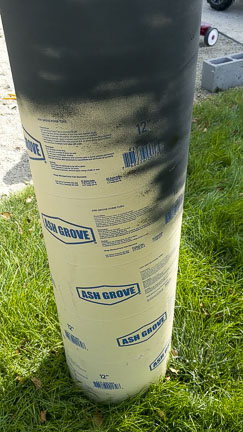
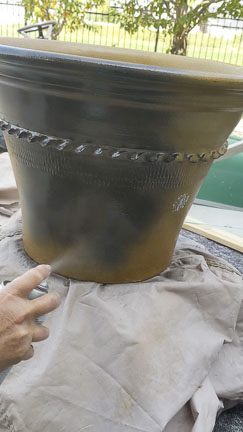
My mom, Joan Atwood, was up visiting for the weekend working on a few other projects with me when I told her about the skeleton heads and my original idea. I told her I wanted to figure out a scaled-down version of the project for the front porch. When I look for inspiration, I like to wander through Home Depot or Restore, looking at different brainstorming options. We started at Restore, and while walking through the aisles, we came across a 5 ft Sonotube typically used as a base for a column in a house. Just the thought of it covered in skeleton heads made me giddy. Mom and I discuss how we could stabilize it for the porch when we say a large planting pot. Sure enough, the tube fits entirely down in the pot. It was a steal. We got both under $15.


DIY Skeleton Pillar Supplies:
- Sonotube 5FT
- XL Planting Pot
- 100 Plastic Skeleton Heads
- Drill
- Drill bits for the size of the screw and a twist drill bit slightly larger than the screw head
- Metal screws
- Spray Paint- Black and Rubbed Oil
- Skeleton Birds-2
- Skeleton Spider-1
- Silk Flowers- Black and purples
- Moss
HOW TO CREATE YOUR DIY SKELETON PILLAR
HOW TO STEPS FOR SKELETON PILLAR:
- Start by gathering all of your supplies to one location and set up a work area covering the workspace with a tarp or blanket.
- Next, spray paint the Sonotube black in case anything shows through it will have a neutral color.
- Then spray paint the Pot Rubbed Oil.
- Next, mark the spot where you should start the skulls on the Sonotube. You do not need skeleton heads down in the pot’s base so place it in the pot and then mark the lowest spot where you should start to adhere to the skulls.
- After that, you will want to plan out the layout of the skeleton heads. Ultimately, we choose a random design because of the look, and it allows us to move through the process more quickly.
- Then we thought through options for attaching the skulls. My original thought was to drill through cut dowels and glue them into the Sonotube. Thank goodness Jet had a better idea. He said, what if we just drill metal screws into the tube and leave some of the screws out to attach the head?
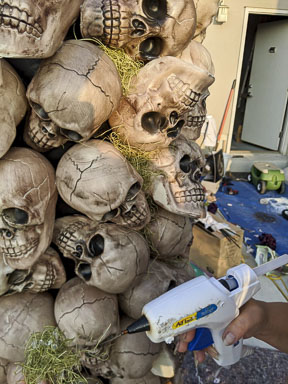
- Next, we tried our first skull by positioning it on the tube first, noting where the screw should attach and where we should drill through the head to get it to lay the way we want. We use the drill to attach the metal screw leaving about 1/4 in exposed to affix the skull. Then we use a twist drill bit to drill a hole into the plastic skull.
- Then I used hot glue around the hole and placed the skull over the screw, attaching it to the Sonotube.
- Then, we began working up from the bottom of the Sonotube, attaching skulls. Using the prior skull base to stabilize the next head and give us another point to stick with hot glue. Just keep going. To be honest, this is pretty time consuming, and it will take you a few hours to attach all of the skulls.

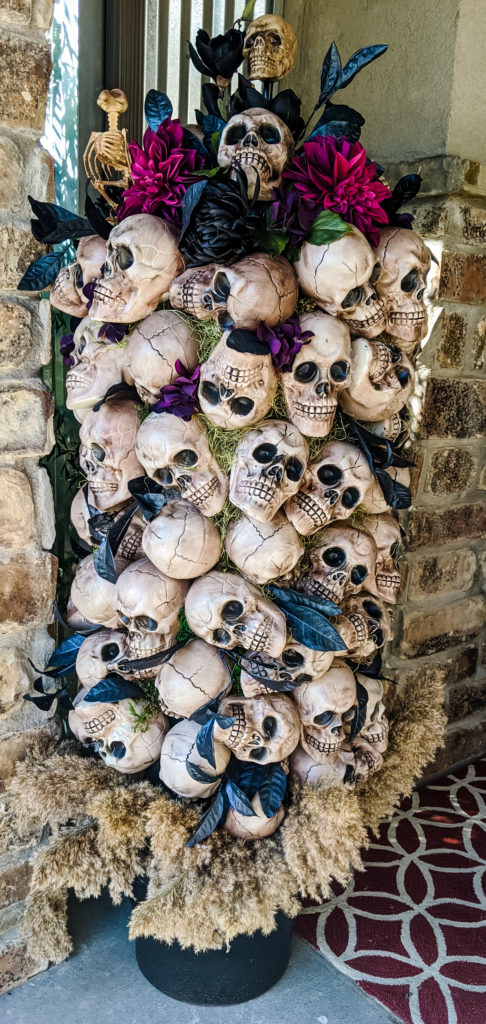
- After all of the skulls are secured to the Sonotube, it is time to fill in between the heads. This is where we used moss and hot glue. I highly recommend using something to push the moss in other than your fingers, so you don’t burn yourself. I got a pretty lousy burn doing this, even using a tool to push the moss in, so I found some silicone fingertips that I am excited to try on my next hot glue adventure.
- Once we got all of the moss in, it was time to figure out something to go on top of the Sonotube to close it off and finish the look.
- My mom was up visiting, and we were collaborating on an idea to cut cardboard slightly larger than the shape of the tube. Seth was here, so he helped us to cut out the form. We then cut slits into the overhang of the slightly larger circle.
- Then, we worked on attaching the top. We bent the cardboard’s edges down onto the tube and used black duct tape strips to secure it. Don’t use hot glue. We tried it, it does not hold well enough
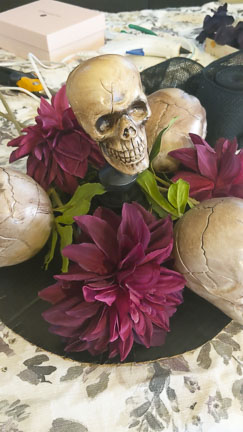
- After we had the top attached, it was time to think about the décor for the top. We wanted to go over the top. We kept a few skulls to use on the top, we had a selection of silk flowers and some skeleton spiders and birds.
- We started to play with a variety of layouts on the cardboard. My mom, Joan, creates some levels for us to build around using some plastic containers. We sprayed one black to use in the middle.
- Once you decide on the layout, it is time to permanently attach things. We used hot glue to adhere the plastic round container in the middle. Then we used 4 skulls on top one on the elevated centerpiece then we used the other three in a pie shape around the cardboard circle.
- Then it was time for the silk flowers. I wanted to tie this project into the colors we used for our Halloween Door Floral Arrangement, so I used the same purple and black flowers. We used three large purple flowers between the skulls then used the black flowers to fill in.
- Next, we attach some bird skeletons to the top for a finishing touch and take some small purple flowers and add them in-between some of the skulls in the top 1/3 of the pillar.
- Finally, it was time to assemble the piece on the front porch. We opt out of attaching the pillar to the pot permanently to be easier to store. We placed the post in the base pot and used some grass to fill in the bottom of the pot that we cut by the lake we live by. If you don’t have something that will work, it could quickly be filled with moss.
Finished DIY Halloween Skeleton Pillar:
The finished result adds the perfect amount of drama to our finished front porch. Lily, our 3-year-old, loves it and helped us throughout the process by handing us skulls and flowers. I think it has an outstanding balance between scary and pretty. Now it is time to bring out the rest of the décor for the front porch.
TELLING YOUR STORY THROUGH DÉCOR:
Making things to display for the holidays is a great way to give your home decor instant memories and story. It is impossible to not think of loved ones and the fun times spent creating things together. Please share ideas and pictures of your Witch Shoes and how you display them.


So amazingly! I just love your Ideas!!
Thanks Janet we love Halloween!
Thanks, Janet we love Halloween!