Tristy Lee – Home Decor | Art | Project Inspiration
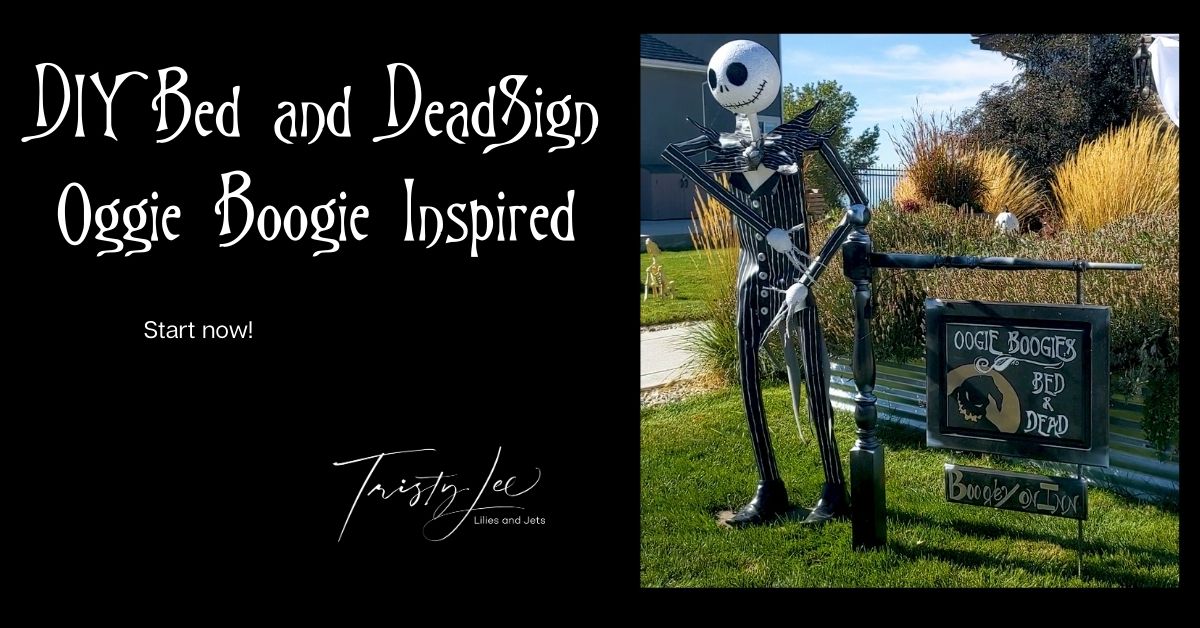
We definitely have a theme for our Halloween décor at our house. We love the Tim Burton Nightmare Before Christmas movie. Lily, our 3 years old, knows all the lyrics to the songs throughout the film. We build a Jack Skellington inspired sign for the house and a 6ft freestanding Jack Skellington outdoor sculpture. One of my favorite places to get inspiration is Pinterest. I keep my Halloween board updated throughout the year with projects that are inspiring. Last year I saw a trend of these fun yard signs that took a spin-off of a bed a breakfast sign. Keeping with our Nightmare Before Christmas theme, here is our spin on a DIY Halloween Oogie Boogey Bed and Dead Sign.
OGGIE BOOGIE SIGN INSPIRATION:
The Oggie Boogie man is one of Lily’s favorite characters, so we decided to brainstorm ideas based on his name in the movie. While sitting at the dinner table, we were pitching ideas back and forth, and this will age us, but we both love old school disco music, so as soon as we thought of Boogey on Inn, it was settled. Our first stop for the project was the local restore. Since it is for the outside, we like to start there to save costs. We found most of our supplies there.
HOW-TO CREATE DIY BED AND DEAD SIGN INSPIRED BY OOGIE BOOGIE
SUPPLIES FOR CREATING YOUR HALLOWEEN BED AND DEAD SIGN
• Post: You could use a bedpost or handrail post. If we had to do this project again, we would try to find two posts for each side to add strength and stability.
• Baluster: We used one across the top of the sign for a decorative hanger
• Wood for the sign: We used wood that was originally a kitchen cabinet door and drawer door.
• Bracket: We used a bracket to stabilize and attach the side post to the top baluster.
• Paint: Spray Black and White, Acrylic Pens (White and Gold)
• Rebar
• Chain


How-to Steps for Oggie Boogie Sign:
1. You start this by spraying the sign, baluster, and post with black spray paint
2. Then you can draft the image and text for the sign on your computer
3. Use a projector to show the image on the board and trace it on the image.
4. Next, use acrylic pens to fill in the image and text on the board
5. After that, we used a bracket to attach the baluster to the post
6. Then we attached a chain using an eye hook to the baluster
7. You can use a smaller sign below with a chain following the same method
8. After that, we used a long drill to drill a hole into the post to insert rebar to hold the sign up
We found that the sign was too heavy, so we attached the rebar to the back of the opposite side of the frame to stabilize it. (If I had to do this again, I would use 2 posts, one on each side)
TELLING YOUR STORY THROUGH DÉCOR:
Making things to display for the holidays is a great way to give your home decor instant memories and story. It is impossible to not think of loved ones and the fun times spent creating things together. Please share ideas and pictures of your Witch Shoes and how you display them.


This looks like such a fun project to do. I will have to gather my supplies and make a few for my house. Janey Mahmud Kimberlee
recommended article
Thanks!
exceptional post, i love it