


TRISTY LEE – HOME DECOR | ART | PROJECT INSPIRATION
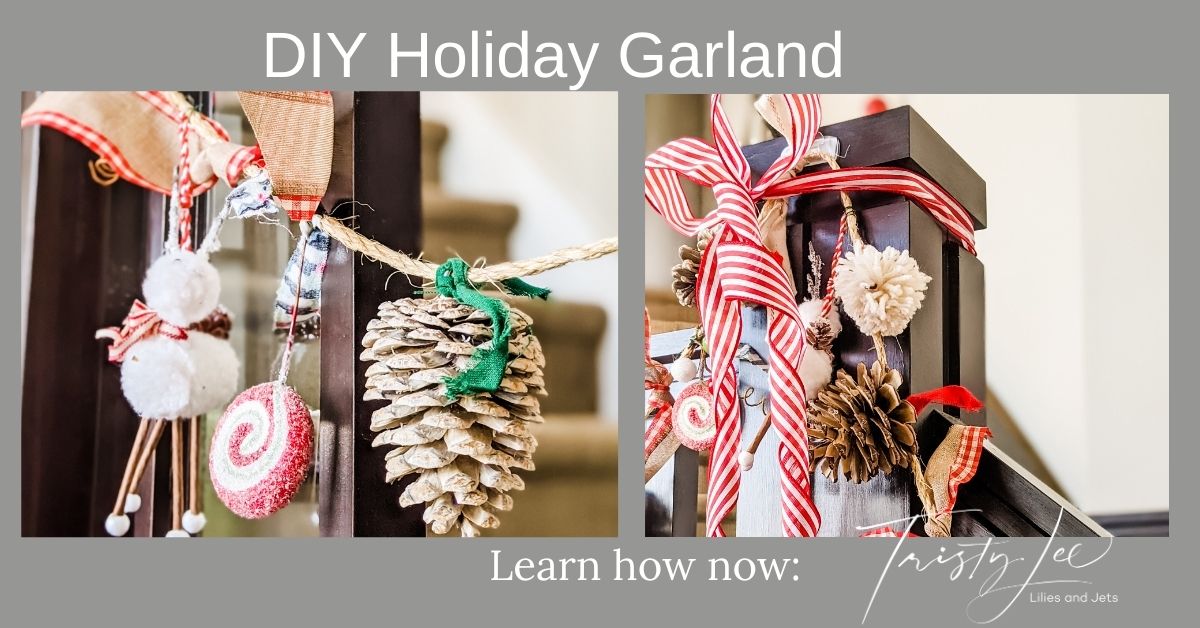
I have been searching for the perfect way to decorate my staircase for the holidays for several years now. I have tried several things that I just wasn’t happy with the finished product. This year Lily gathered 100+ pinecones during her nature walks with her grandma this spring. I was determined to think of a way to use them with my Christmas Decorations. While looking around on Pinterest for holiday décor, I saw some garlands using pinecones and fresh greens. I tried fresh-cut tree greens on my stairs a few years back, and our weather in UT is so dry it even after misting them daily with water, they were a dry mess. That is when I thought about using them in a DIY Holiday Garland.
Holiday Garland Inspiration:
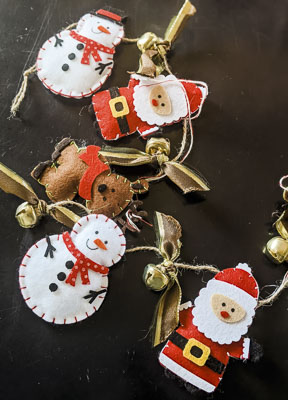
Last year I went to Gardner Village here in UT during their annual Witches Festival with my friend Sara Bradford. We found the cutest garland made out of felting characters, and I almost bought a couple of them until she said those would be fun to make. I thought it was a great idea but then promptly forgot about it until she gave me a Holiday present where she created a version for me. Since I just loved it, and it is the inspiration for my garland. I used a very different approach using the pine cones and random holiday ornaments and ribbon, but the concept came from this beautiful handmade garland she gave me the year before.
How to create a DIY Holiday Garland Video tutorial:
Supplies:
- Twine
- Pinecones
- Eye hooks
- Ribbon
- Ornaments
- Bells
Instructions to create your garland:
- First, gather all of your supplies and cover your workspace
- Then, Cut twine into 6ft to 8ft lengths
- Next, Drill starter holes into your pinecones, then screw in eyehooks. I used between 4 and 6 pinecones per length.
- After that, get ornaments, ribbons, bells in colors that coordinate with your Holiday Décor.
- Then you could create some pom-poms with yarn.
- Next, Create a loop at the end of the twine and secure with wire to allow you to hang your garland,
- Then, begin attaching pieces in random variety at about 2 in intervals and using a ribbon piece every 3 or 4 attachments.
- After, Feel free to hand these anywhere, including on the tree.
- Finally, use small command strips work great. I really like the design for hanging lights since it slips right around the twine.
Finished DIY Holiday Garland:
This was a fun project, and it had elements where Lily, my 3-year-old, could help. This would be a super fun project to do with your whole family, and it is straightforward to do. Get creative and have some fun. I would love to see your finished projects. Remember, when your working with family, creativity, and flexibility is more important than perfect spacing. I promise these look better imperfect anyway.
WANT MORE LILIES AND JETS:
See more projects on our Blog
Follow us on Instagram: Lilies and Jets


+ show Comments
- Hide Comments
add a comment