
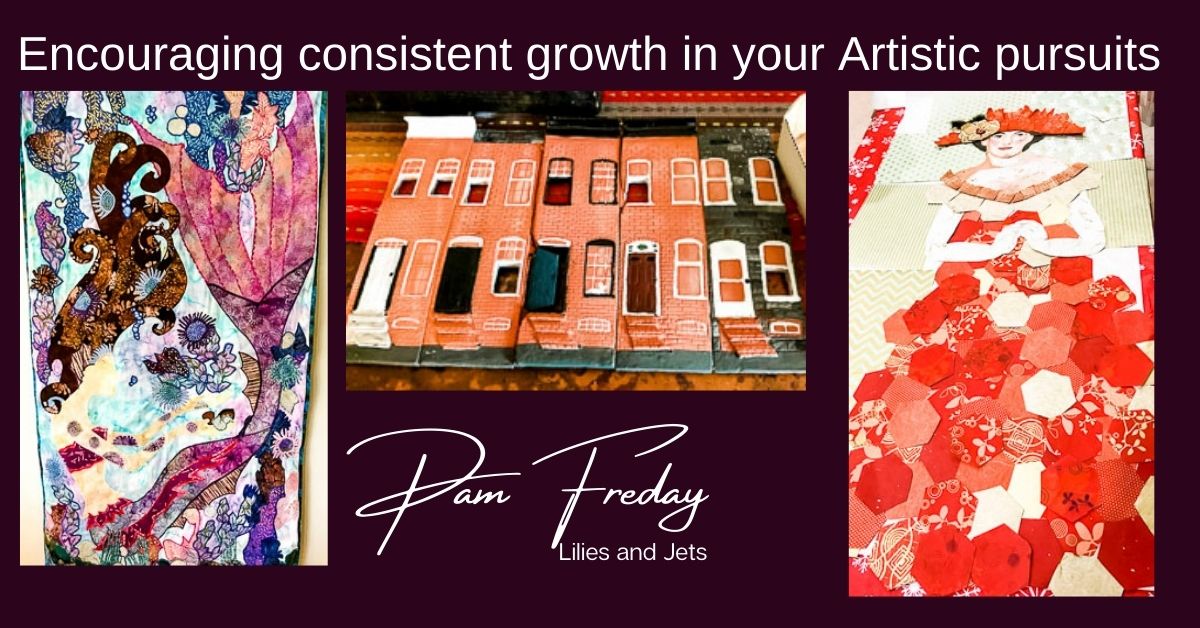


Pam Freday| Artist | Clay | Fiber Art | Jewelry| Quilting
Hello fellow artists. There are hearty debates on the differences between crafters and artists. I believe anything you create is art as it is a true reflection of you. Because of this, we are all artists! Growing as an artist can take many paths, and be brave about showing off your creations. I am always trying to encourage consistent growth in my artistic pursuits.
Learning and Sharing Feedback with a group:
My favorite medium right now is clay. I also work in wool fiber, fabric, and multimedia to create my artwork.
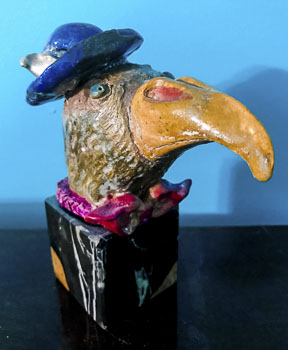
When I was first learning to work with clay, I attended evening get-togethers where the Clay Guild invited any crafter or artist level to join and participate in a themed event. This event was themed around birds. You probably have seen different variations of this type of get-together where individuals are invited to try their hand at a particular type of creation while enjoying their favorite beverage. Somehow people become a little less afraid of their ability when a beverage is involved. Each person had the same set of guidelines, the same amount of clay, and birds’ same theme. Well, the range of creations was amazing. There were bird masks, bird wings, full bird sculptures, bird heads in styles striving from realism to whimsical. Everyone has their own style or perception of creation that comes from within. The more you explore your abilities, the more your own style develops.
Removing the fear from trying new Artistic interest:
So why are we afraid to try different or new kinds of crafts? The type of comments from new artists often heard related to lack of experience or making mistakes. In this piece, I’ll share with you some of the techniques gathered to appreciate your work, gather feedback and meld your interests across different mediums.
Give yourself some time:
Almost everyone hates their first piece made in any craft. My first clay teacher advised our class would likely have the same opinion of our first pieces. While our expectations were high, the truth was we were all still learning. Once the piece was completed, our teacher advised us to put the piece under our bed if we hated it and take it out in a year to critique it. This way, you could see how far your ability had come. Generally, the piece looked much better a year later. We are, after all, our own worst critics.
Open up to feedback by working with other Artists on the same journey:
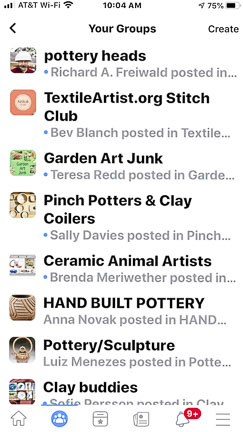
Let’s say you are working on a piece, and something just doesn’t look quite right. Or perhaps you have a choice between two different approaches, and you want another opinion. How do you go about collecting that honest and valuable feedback? If you are lucky enough to be at a gathering where other artists are present, you can ask their opinions. It doesn’t matter if they are using your chosen medium be it scrapbooking or sculpture. If you work alone or are just venturing out into a new hobby, try joining a Facebook group.
When Facebook came out with groups, I joined several groups relating to clays, quilting, watercolor, and felting. In these groups, people often post their finished creations and ask the other member’s opinions. I am always amazed at people who post their work and think it’s not worthy, yet the other group members give great feedback. This is one way you can test the water on what you think is your work’s quality. Pinterest and Etsy are also great places to see what other people are doing in your particular area of interest.
Cultivate a relationship with a peer Artist:
I have a friend who also has a similar interest as mine, and we met in a clay class. I have since moved many states away, but our friendship remains intact. It’s not unusual for us to have a string of text conversations asking each other’s opinions and sending pictures back and forth. The key is to have a friend who knows your style and is willing to give honest feedback. This has been a very valuable tool in growing my artistic pursuits.
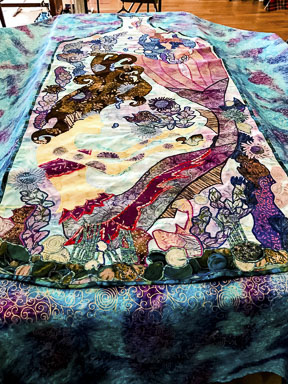
This friend also taught me another great way to evaluate my own work. She used the technique of taking a picture on her phone. The actual picture adds a perspective that can help you decide which direction to go. If you don’t have an artist buddy handy, try taking a picture and look at it objectively. We recently had a great back and forth on a quilt top I was working on. I had picked a beautiful blue and purple embossed with gold swirls on one side and plain batik on the other side. When I bought the fabric, I thought it was perfect for the quilt. Later, after I finished the quilt center, I was worried the background fabric with the gold swirls was too busy. After a quick text exchange, she reminded me that my first choice was generally the best and the pictures told the story.
Try 3 step creative process:
Another tried and true method utilizing self-critique comes in a 3 step creation process. Step 1 in the process is to create a small mock-up of the end vision. By doing this, you can judge the overall perspective and interaction of the piece’s multiple elements. In step 2, you create a full-size piece to ensure your vision is executable. In the third step, you take all the lessons learned and execute your vision. Every step teaches you something new.
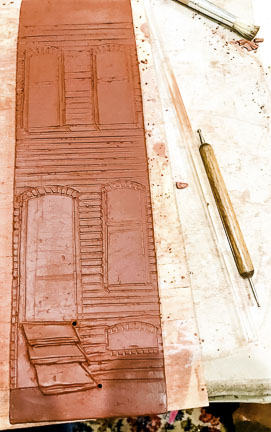
3 Step Creative Process Artistic Example:
I chronicled my journey in this picture series, creating a slab (tile) version of my friend’s rowhouse in Baltimore.
1. Small Mock-Up:
I start by creating a single rowhouse. Then I compare it to the pictures to ensure the proportions were correct. Next, I use red clay, thinking it best resembled the color of brick, and I would color in the grout.

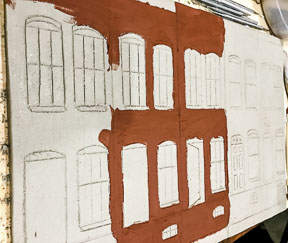
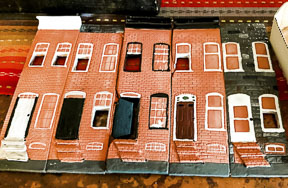
2. Full-size sample:
I made my original vision that included “open” windows and doors, created the 5 houses separately, and assembled them before firing. The lessons learned from this firing were open doors and windows created cracks, contributing to the tile warping.
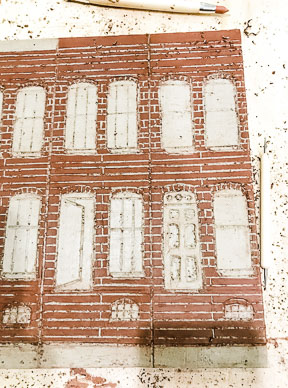
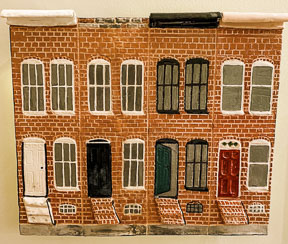
3. Growth Through Applying Lessons Learned:
This time, I made the tile smaller, making only 4 rowhouses on a smaller scale. I created this as a single tile without assembly to try to avoid the problem of cracking. Additionally, in step 2, I realized that painting grout lines on this project’s size would be challenging. So, I made the base tile using white clay and brushed a layer of liquified red clay over the white. This way, when I carved the bricks, the grout would be the underlying white clay. To give the piece some of the illuminations I had in my first vision, I will mount the tile on a slightly smaller piece of wood and put battery-operated mini lights behind it. It won’t give the appearance of open windows or doors, but it will make the tile glow.
Finishing up the project:
Update after kiln firing: Still dealing with a crack in the tile, but I’m going to consider it a happy accident and work with it. After all, these homes are more than 100 years old, and cracks happen.
Encourage you to try these options to grow in your artistic pursuits:
So fellow artists, be fearless. Ask for other’s opinions but don’t be stopped by worrying about making a mistake. If you use the 3 step method, you make those learnings along the way. Have fun creating! You should try some of these ideas to encourage growth in your artistic pursuits.
WANT MORE LILIES AND JETS:
See more projects on our Blog
Follow us on Instagram: Lilies and Jets
Just a little note…
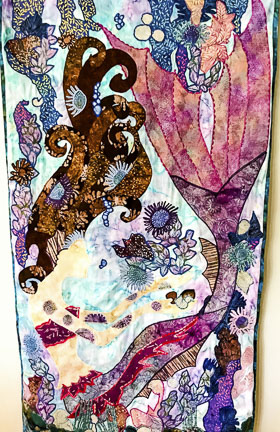
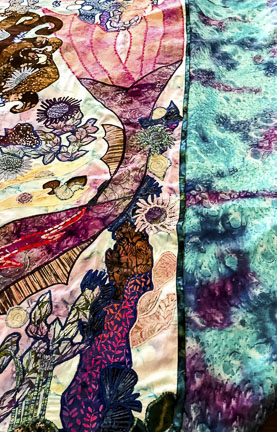
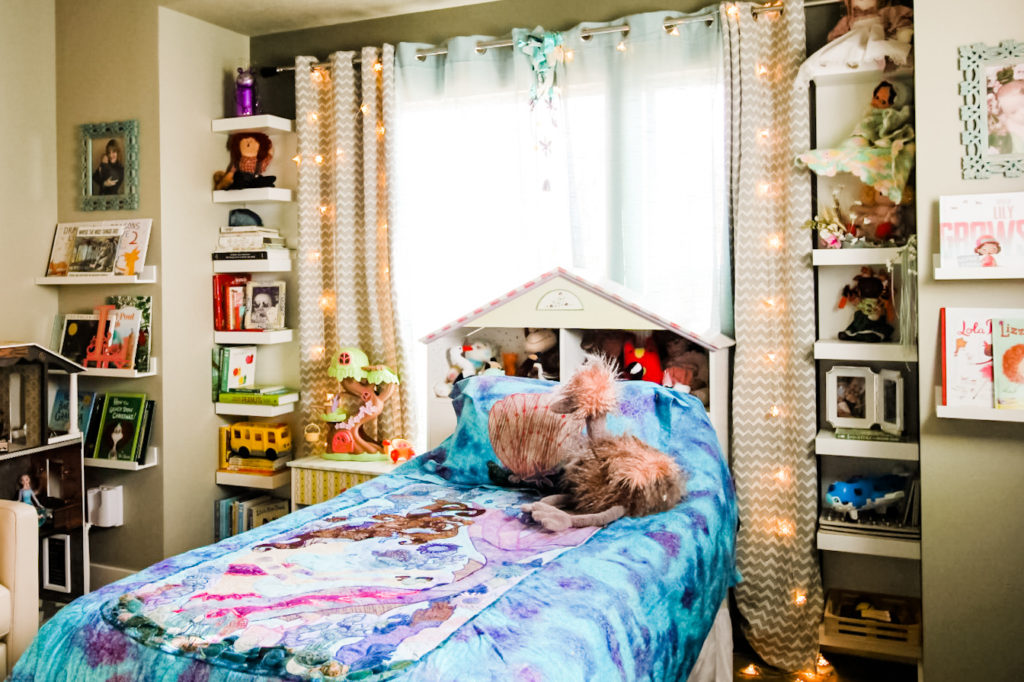
Pam made the mermaid quilt for Lily and she just loves to take people into her room to show them her mermaid quilt. It is so beautiful and I am blessed to have this amazing artist as a dear friend and contributor to Lilies and Jets. Here is peak of it in her room.


I will second that Tristy! That quilt is just amazing!
I am the lucky recipient of the row house clay piece and it is my most favorite thing in my new house! Every time I look at it, I remember all the great times we had in that row house in Baltimore!
We are certainly blessed to have such a talented and giving friend like Pam!
❤️
She is amazing!