


Tristy Lee- DIY | Home Decor | Art | Project Inspiration
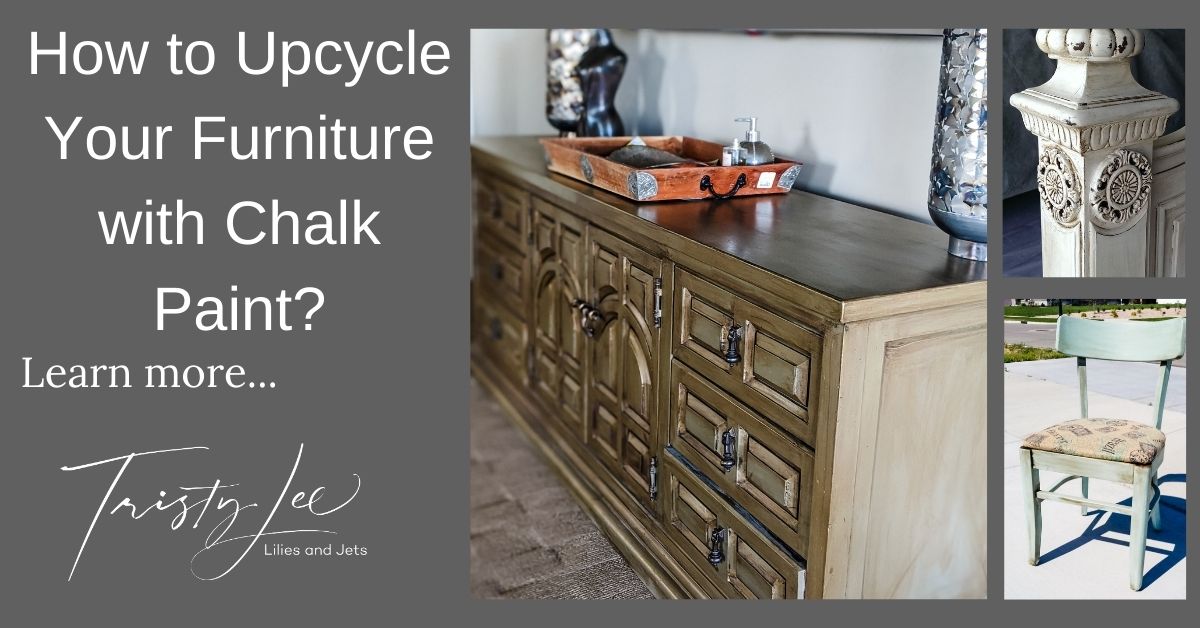
Have you ever thought about refinishing furniture? I could spend hours looking at the furniture transformations I see on Pinterest. Looking at beautiful furniture refinish projects is one thing taking one on is scary. We have a couple of short term rental properties, and the initial investment in furnishing an entire home is substantial. I refuse to compromise on an interior design even when the budget is tight. I am here to tell you can have it all style, affordability, and ease with Chalk Painting. I will walk you through why you should try Chalk Painting. Then we will talk about how to Chalk Paint furniture. Finally, we will talk about selecting furniture to try out Chalk Paint.
Chalk Paint Inspiration:
I remember watching my mom and dad taking on refinishing projects. After watching them, refinishing furniture was not on my list for upcoming DIY projects. They were not easy sanding, sanding, more sanding they seemed to take forever. So while I loved the pretty picture on Pinterest, I was a little shy about taking one on. There were a couple things that ultimately gave me the confidence to try chalk painting furniture.
I am always curious to know more about the passions and interests of my friends and family. We always enjoy our double date dinners with friends. We had some friends visiting from Michigan Matt and Valarie Dalson on vacation. When Valarie and I started talking, she told me about her new hobby chalk painting furniture. She was even selling some of her finished furniture projects at local markets. After she finished showing me some of the pictures of her work and walked me through the basics of chalk painting furniture, I was like, ohhhh yeah, I’m totally going to try it. I owe Valarie a huge thank you for inspiring me to try chalk paint because it is now a go-to favorite of mine. Gaining confidence with chalk painting gave me the confidence to try other furniture refinishing projects like Gel Staining.
Why to Chalk Paint Furniture:
I think the best reason to consider chalk painting furniture is the ability to upcycle your current furniture or get or use high-quality real wood furniture and give it a completely new look.
• Minimal sanding just need a light sanding of the surface to break up the current finish
• Distressed looks mean the furniture can be a little bit beat up and still look great
• Option to add dark wax to give it an antique finish
• Easily layer colors to create dimensional looks
• Easy to apply chalk paint and wax
These are just some of the reasons to try Chalk Painting.
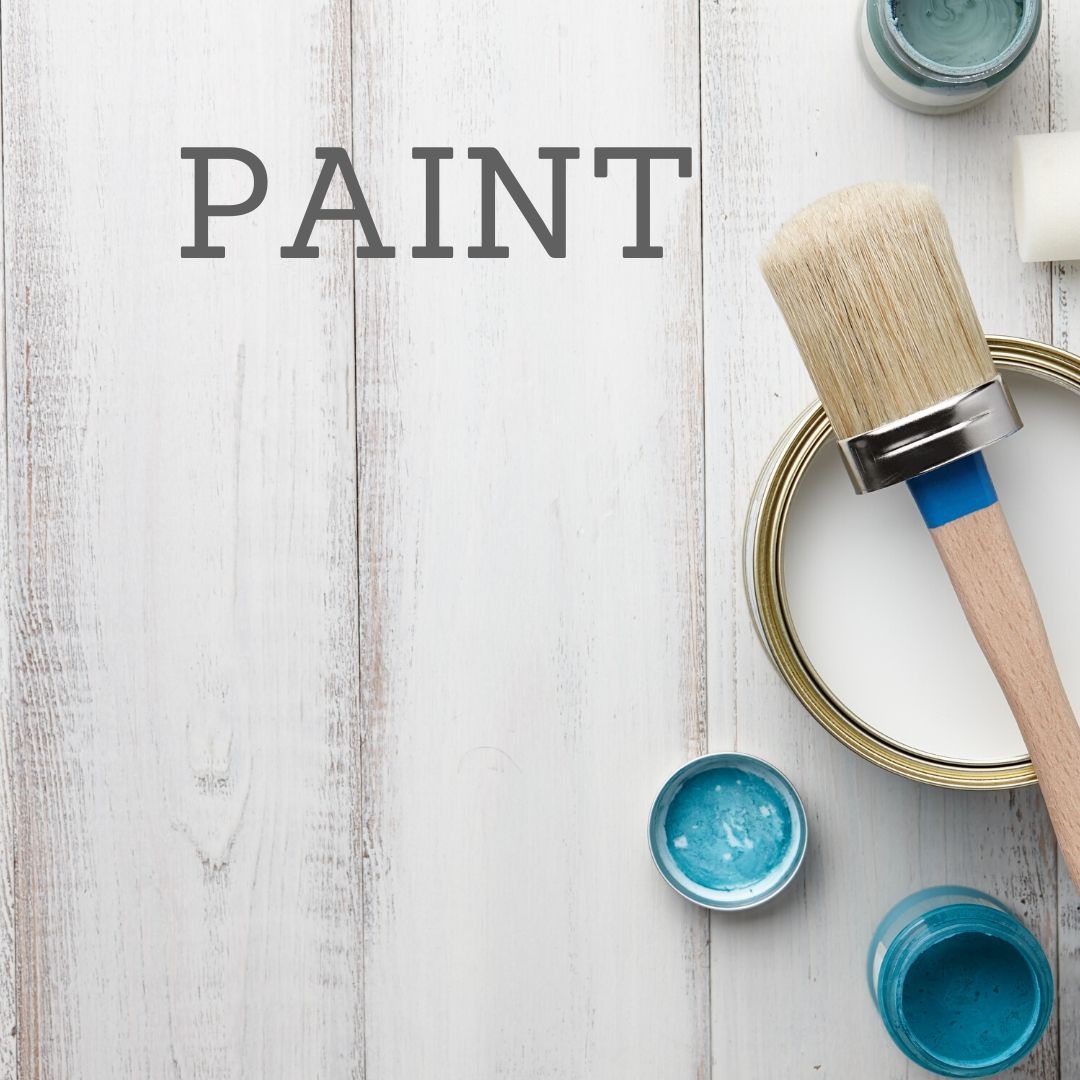
How to get started with Chalk Painting:
I always embrace the idea of trying new DIY projects but starting small with minimal expense to make sure I really want to invest in it. So I immediately started researching where to start, and the expert with the best of the best is Annie Sloan her products are amazing as I would later find out. I didn’t start out using her products again. I started with a no-risk project.
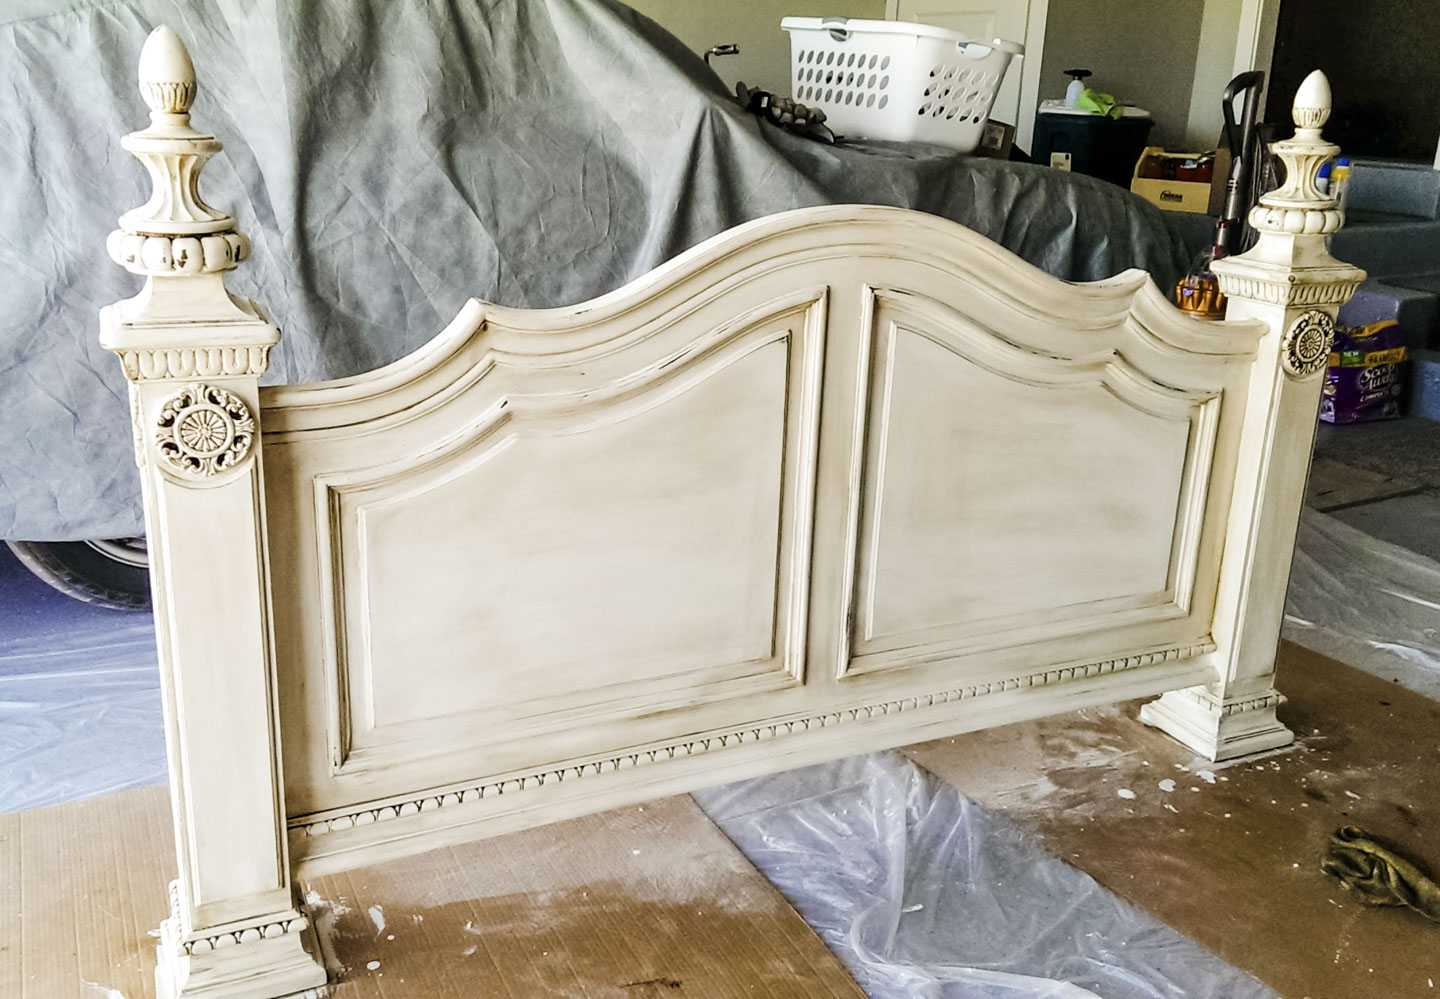
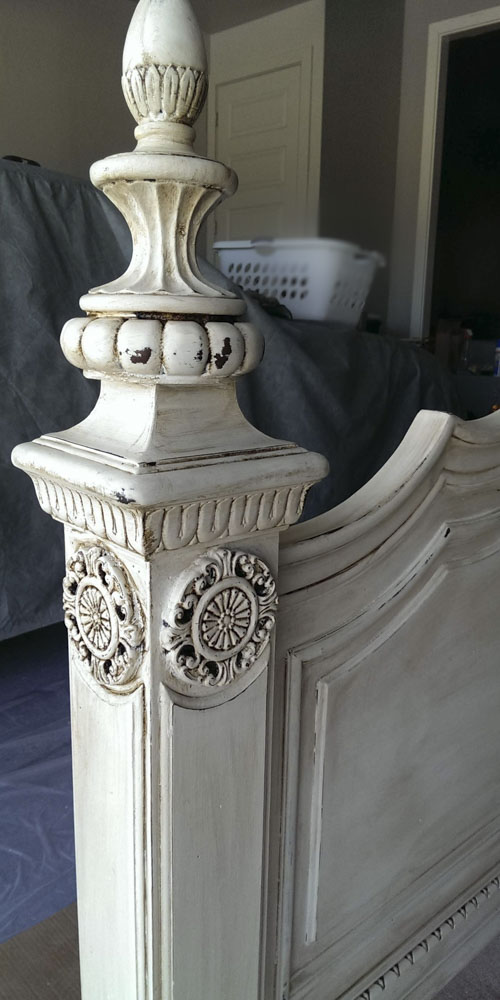
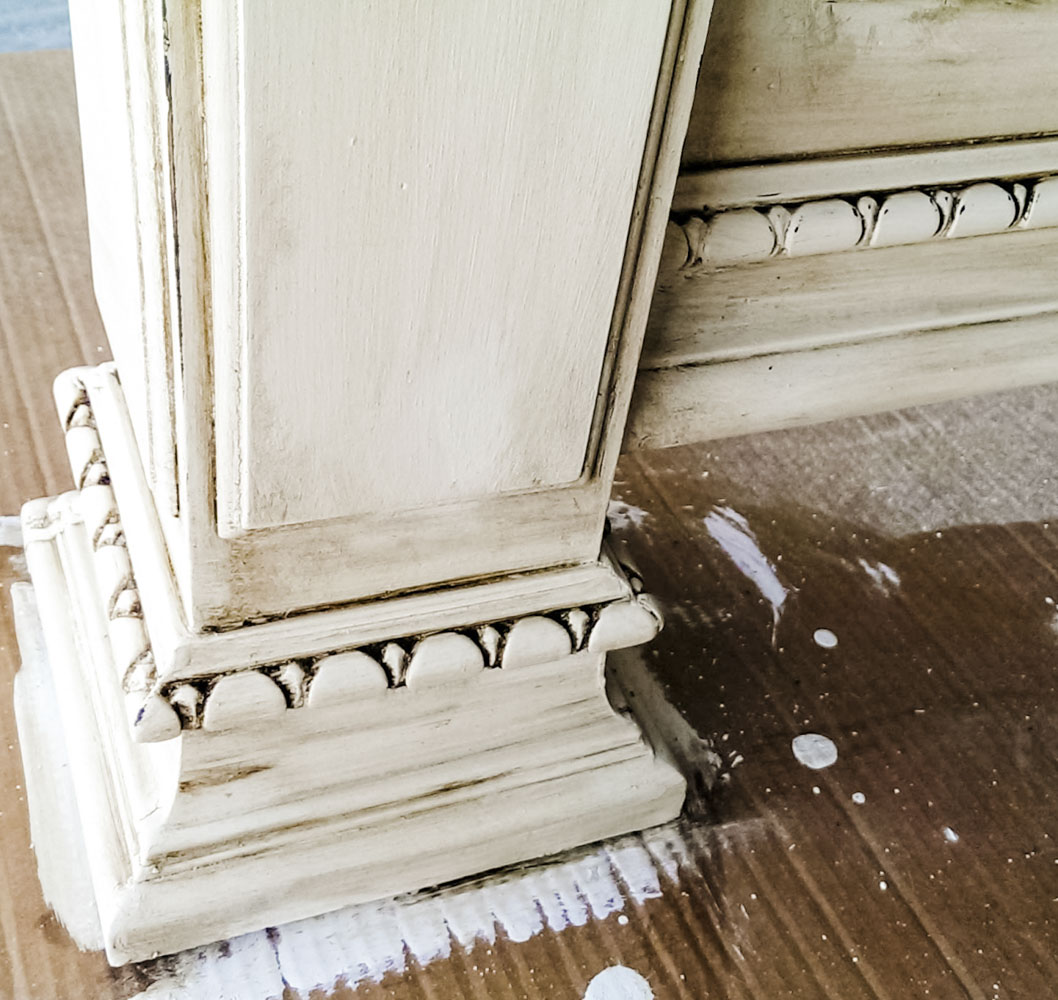
I talked to Jet about wanting to do it, and crazy enough, we were driving to his mom’s house for lunch when we saw a yard sale, and right out front was a wooden headboard. Jet is definitely known for his negotiating skills, and it is a running joke in our family that I can look at, but he does the buying. $10 later, we had my first chalk paint project loaded in the back of our FJ.
Gathering supplies:
Now that I found the first project, I needed to get the supplies together. Since this was my first adventure with Chalk Painting, I decided to keep costs low. After looking at countless tutorials and supply ideas on Pinterest, I made some decisions for the project. One of my favorite places to get painting supplies is Restore. It is not for profit home improvement store where you can donate and buy home improvement supplies.
Paint: I knew I was not going to need a lot of paint, and they re-sell leftover paint that has been donated. I got lucky they had a warm off-white color.
Plaster of Paris: I mixed my own chalk paint using the recipe I found on Pinterest.
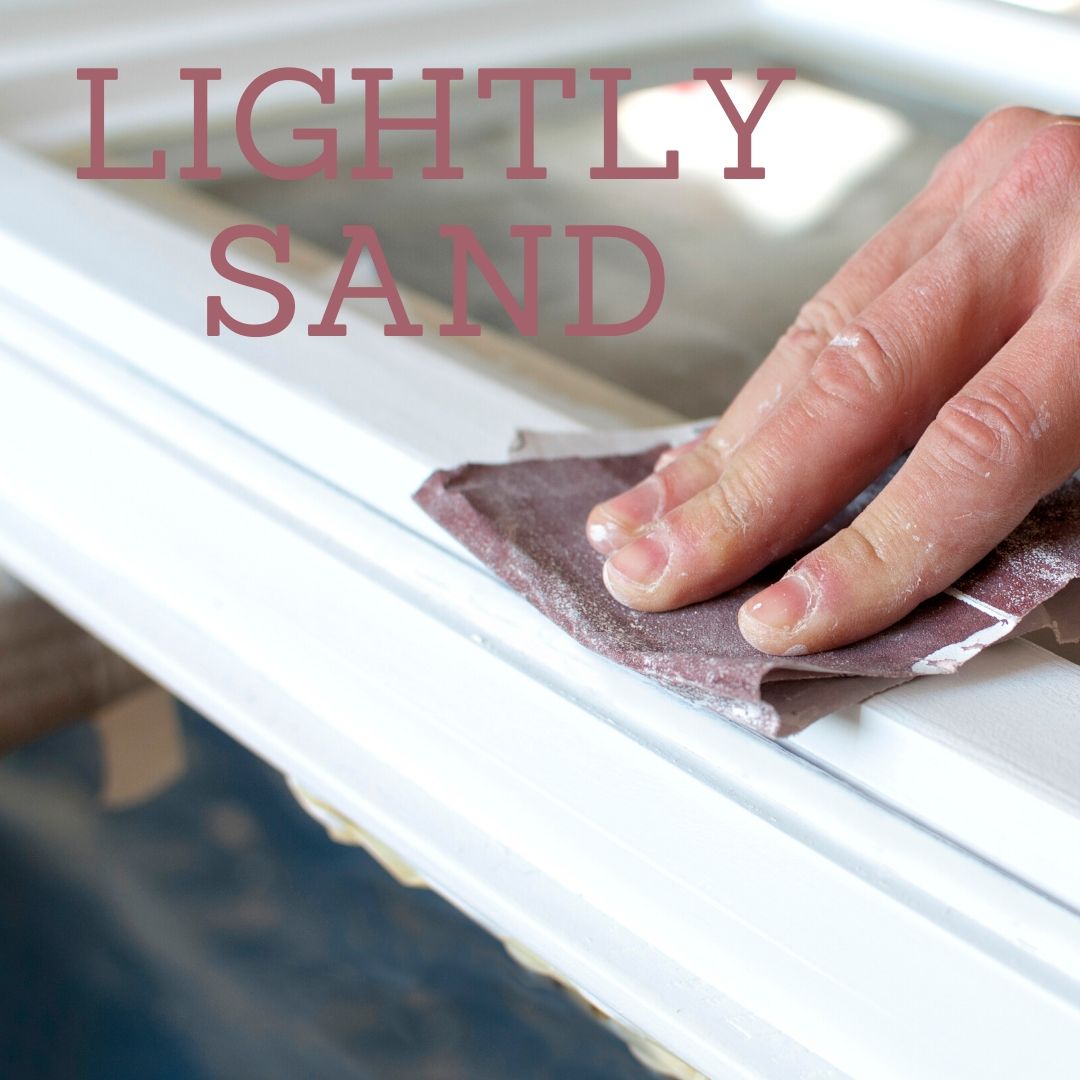
Sandpaper: I used 120 grit-fine paper to lightly sand the scuff the finishes on the headboard.
One of the best things about Chalk Painting is its adherence properties. One of the primary reasons I wanted to try chalk painting was to see if I could transform furniture without sanding it to bare.
Brushes: You will need several for this project, a traditional paintbrush, and 2 wax brushes.
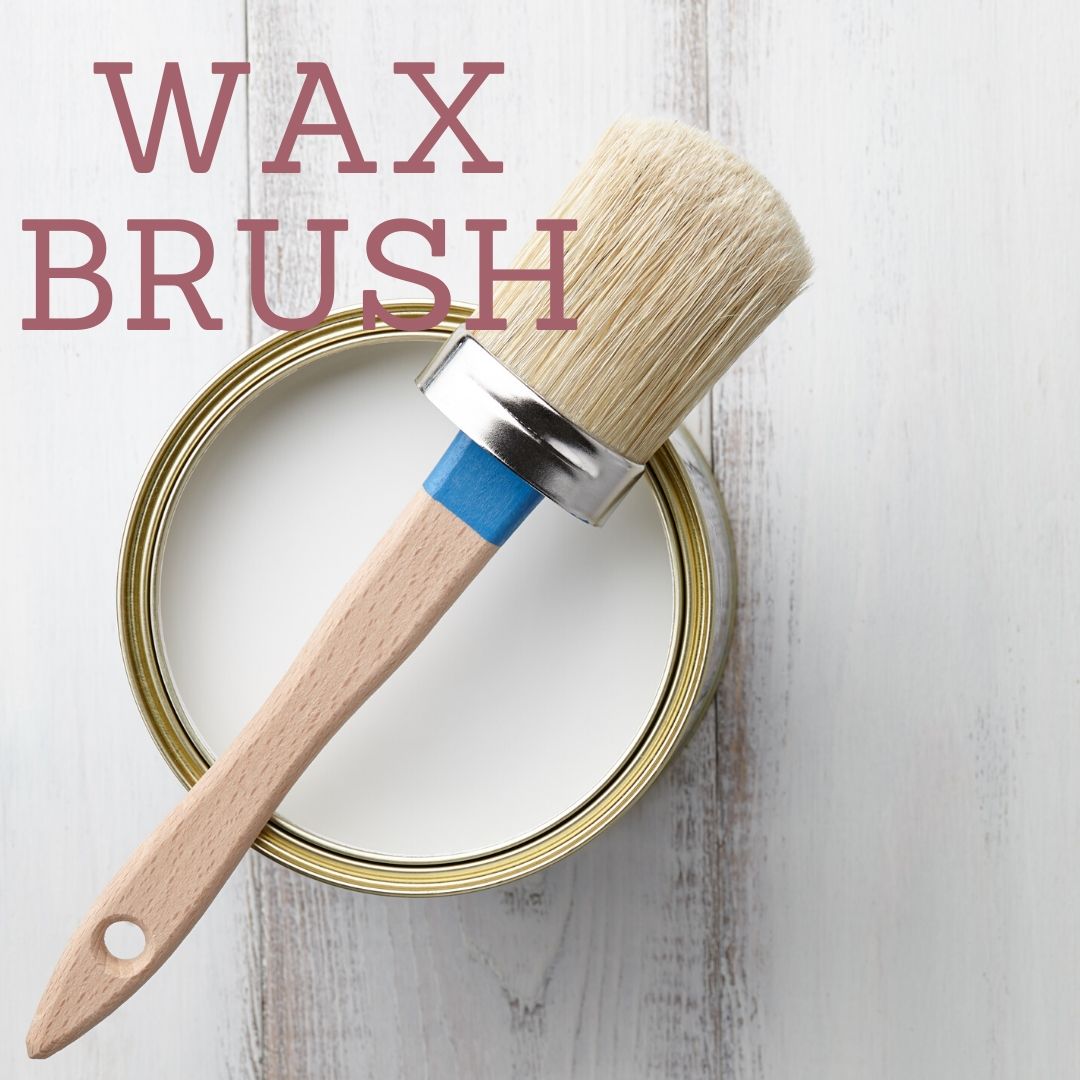
Do not skimp here buy good wax brushes. The Annie Sloan brushes are amazing. I also found some at Michaels and Hobby Lobby and you can use a coupon on them.
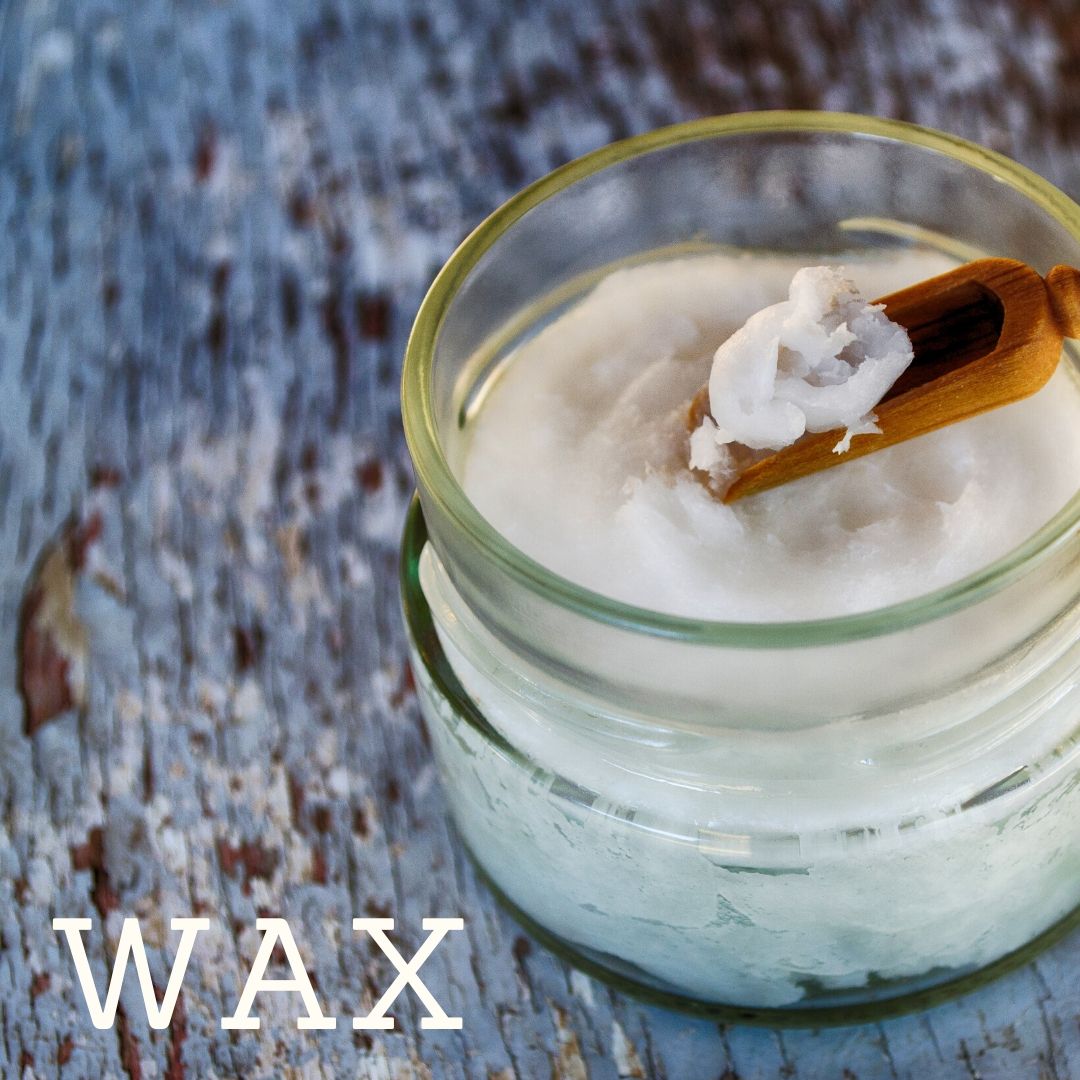
Wax: I used Minwax furniture wax. I really wanted to try the looks that I saw with dark wax, but I didn’t really want to pay for it. I had some espresso stain at home, so I mixed it in with the clear wax to make it. Later I saw on Pinterest other people had the same idea, and I can say this part worked great.
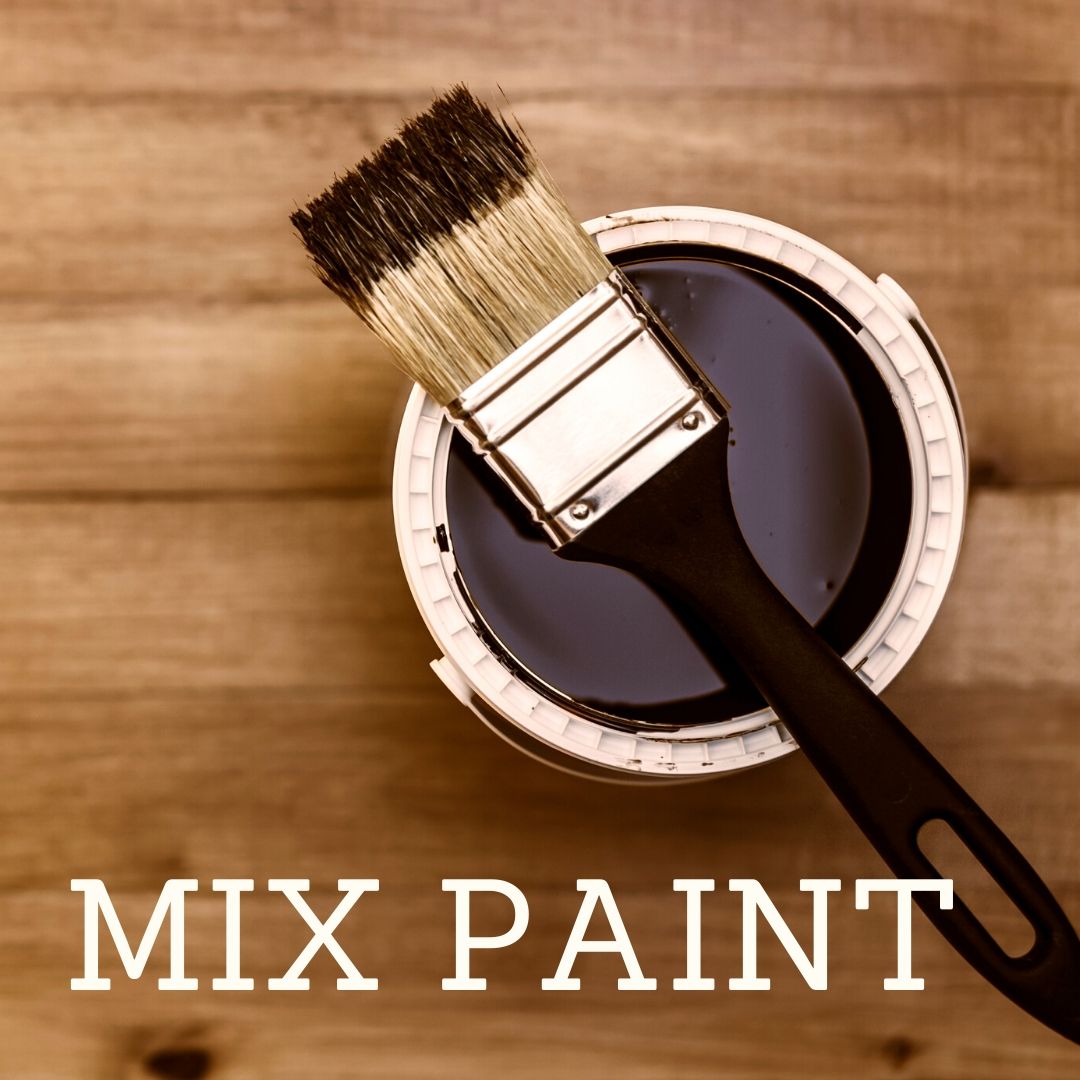
Process for Chalk Painting
I fell in love with chalk painting and refinishing furniture with the very first project. It is an efficient process that can be completed in less than a week, and the finished product is so beautiful.
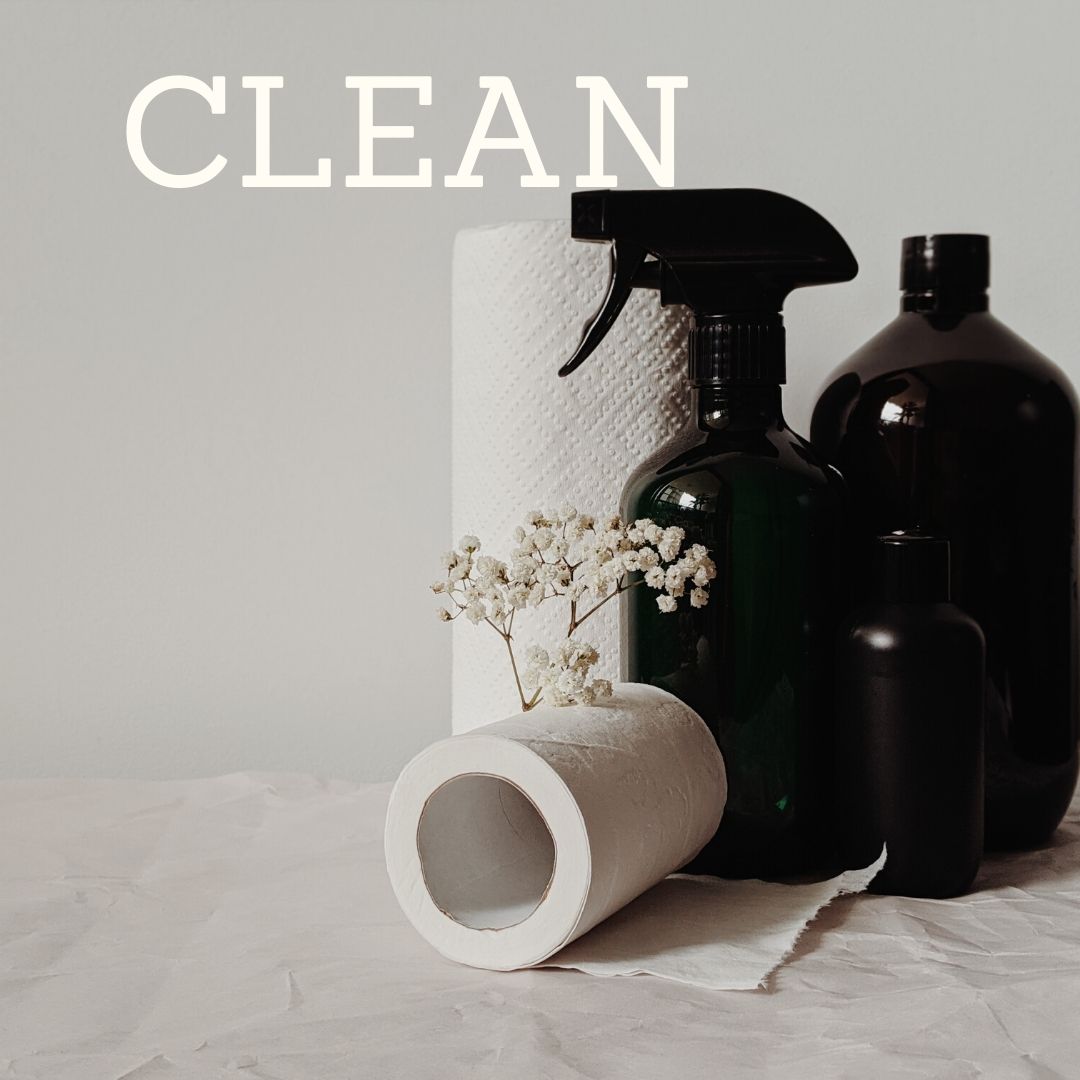
1. Make sure to prep your furniture by cleaning it and removing hardware.
2. I started by lightly sanding the headboard, and seriously I did not spend more than 5 minutes on this step. Clean sanding residue off furniture.
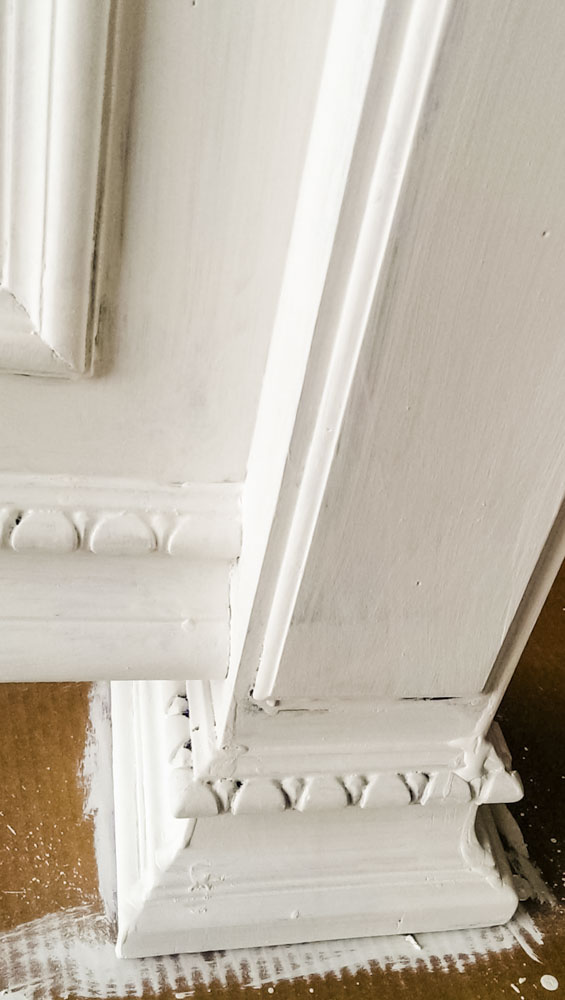
3. Next, I mixed up the paint and applied the first coat. I’m not going to lie first coat does not look good, so don’t panic.
4. Then wait but don’t watch you know what they say about watching paint dry. Just kidding chalk paint dries pretty fast, but to be safe, I would wait 24 hours for the 2nd coat.
5. After 24hours, I put the 2nd coat on, now the headboard was looking like the picture I had in my head.
Time to let it rest again and revisit it tomorrow.

How to Distress and Wax
6. Next, if you want a distressed finish, you can sand with 220 grit sandpaper any edges that you want to have wood show through.
7. Now it is time to wax. You have heard the phrase a little goes a long way to keep that in mind.
8. Think about applying to moisturizer to your skin use a light coat.
9. I used a microfiber cloth to apply it rubbing in a circular motion. Work in small sections and follow up with a clean cloth to wipe off any excess wax.
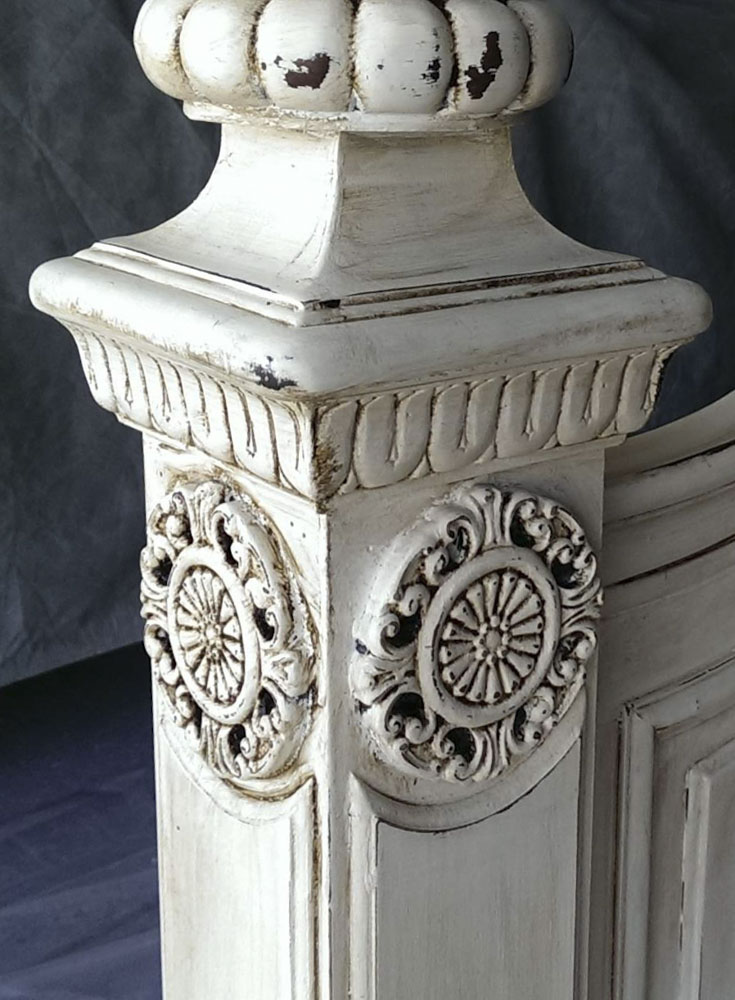
10. So I’ll admit it I have not done a chalk paint project without using dark wax. I think it is one of the best things about a chalk paint project. I always look for furniture pieces with interesting detail because I love how the dark wax looks on it.
11. Don’t be afraid of the dark wax as long as you have done a full coat of clear wax, you can easily control how much dark wax and the effect on the furniture. If you feel like it is too dark, wipe some off if you want more add and wipe off less.
Leave it thicker in the grooves and around the edges for a more aged look. The dark wax will change the color even if wiped off, so make sure to leave it off the areas you want to have original color and blend well. If you need to work some of the dark wax out, I use some clear wax then buff to lighten it up.
13. Wait 24 hours between coats of wax, and I would suggest 3 coats of wax.
14. Wax can take up to 21 days to cure, so you can bring it in after 48 hours just baby it for a while. If it is going to high use, I would probably wait to use it until closer to the cure time.
Selecting Furniture and beyond to Chalk Paint:
The great thing about chalk paint is it can be applied to almost anything. I have personally used it on several types of wood furniture projects. For furniture, I have used is over fully finished real wood, bare unfinished wood, and laminate furniture. I used it on a metal side table, picture frames, and over the wall art.
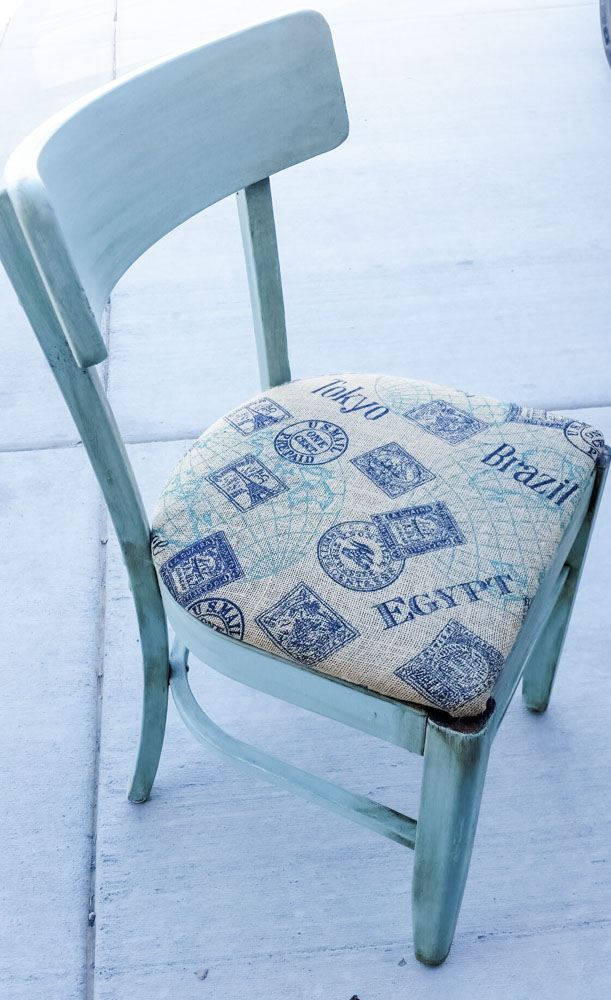
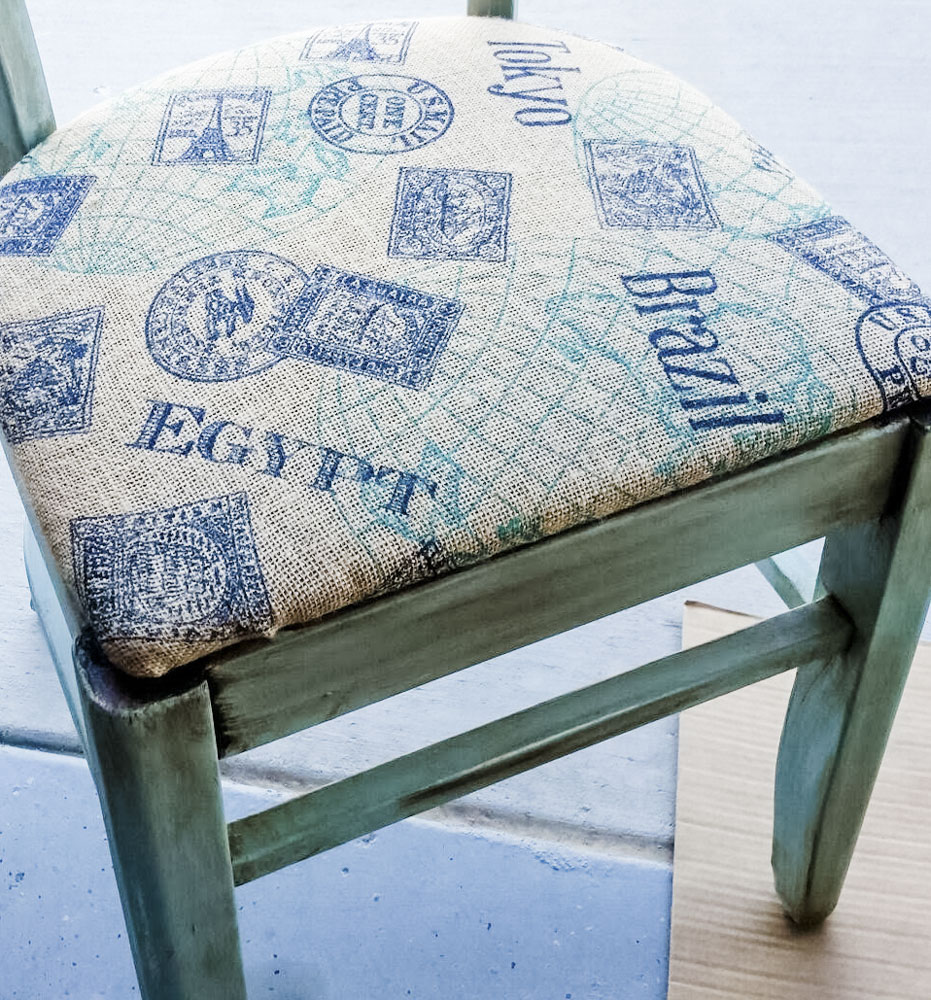
A prior tenant abandoned some sad little wooded chairs. I decided to rescue them with some blue-green paint and dark wax. Next, I took the seats off and used a coordinating burlap attaching it with a staple gun. Take a look at Kids Chair Up-cycle for more chair ideas.
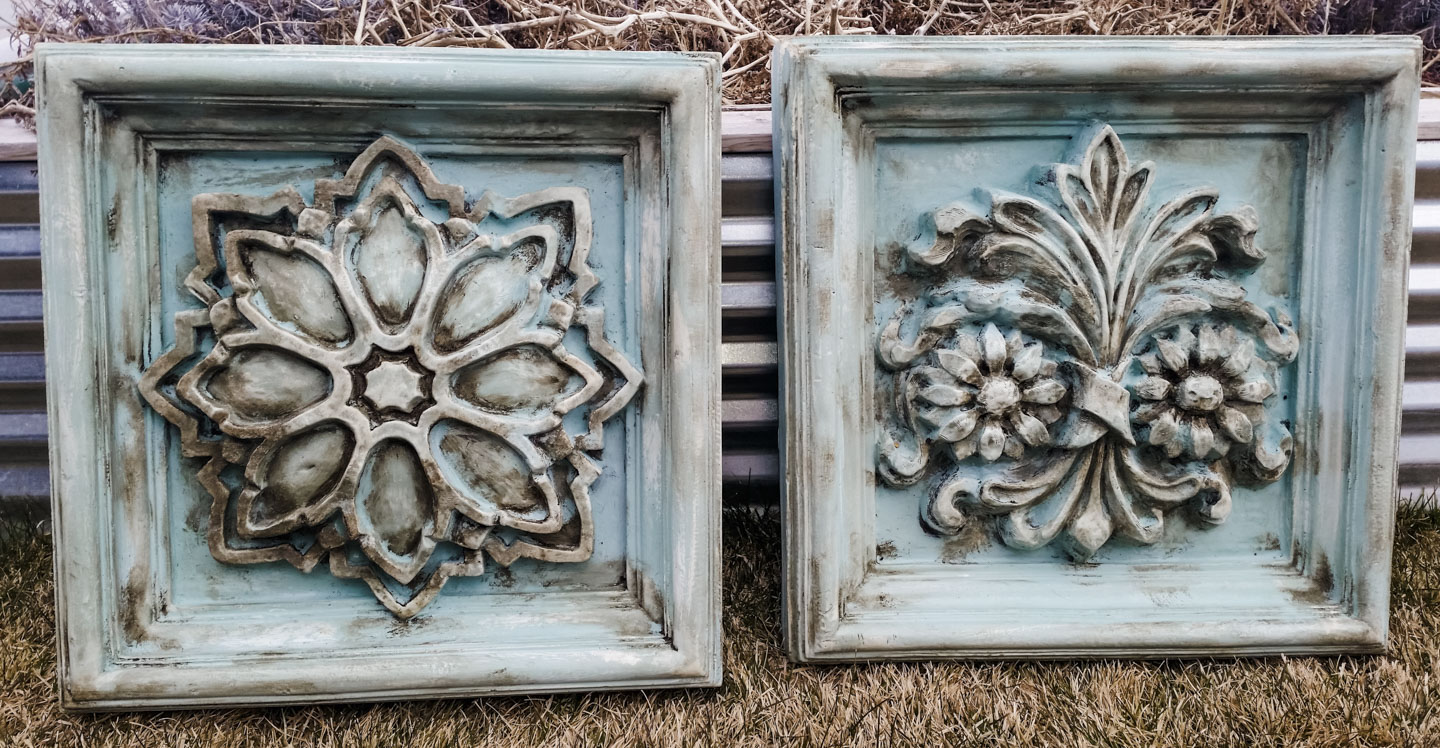
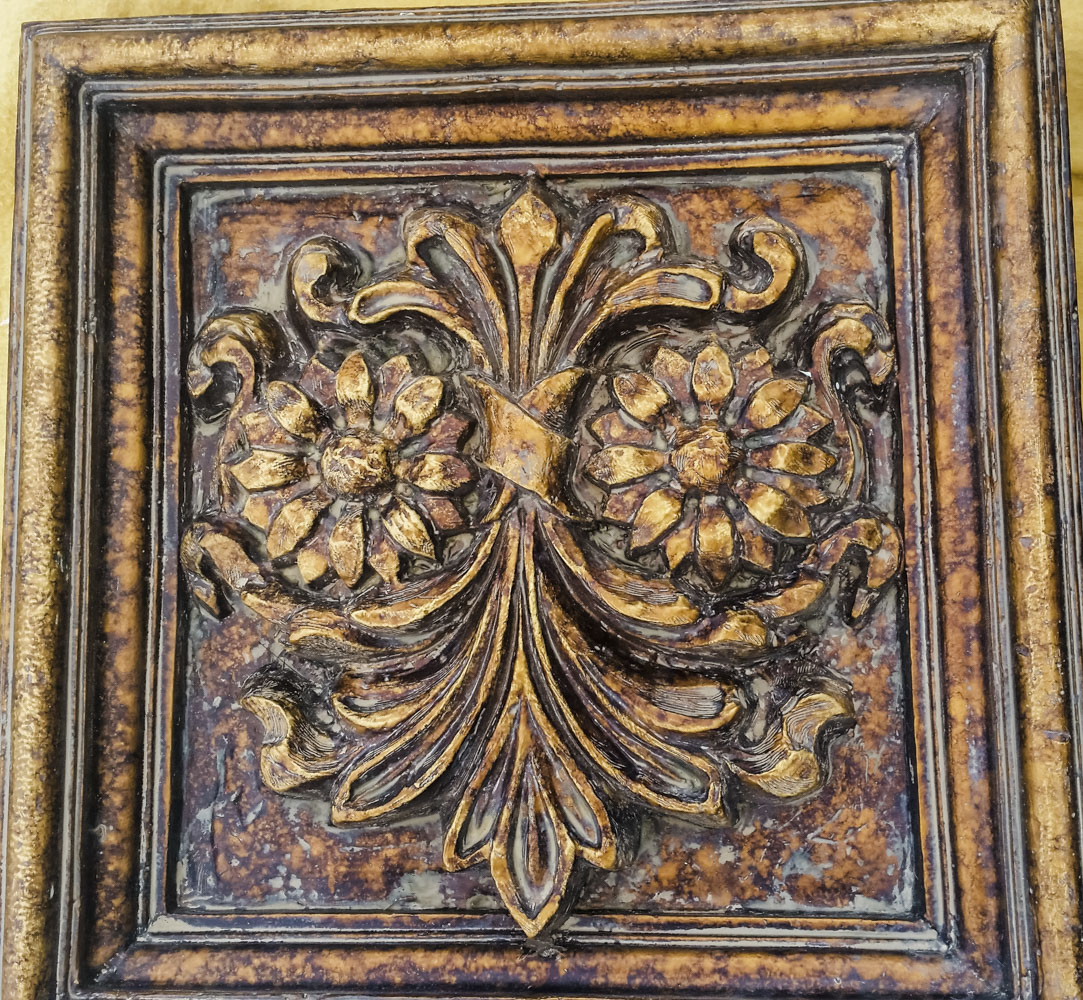
One of my favorite places to go when friends are in town is Park City, UT. We stopped in one of our favorite consignment shops. Right at Home, they had two pieces of art that looked perfect for chalk painting make-over. We used blue-green paint and layered white over the top before finishing with dark wax.
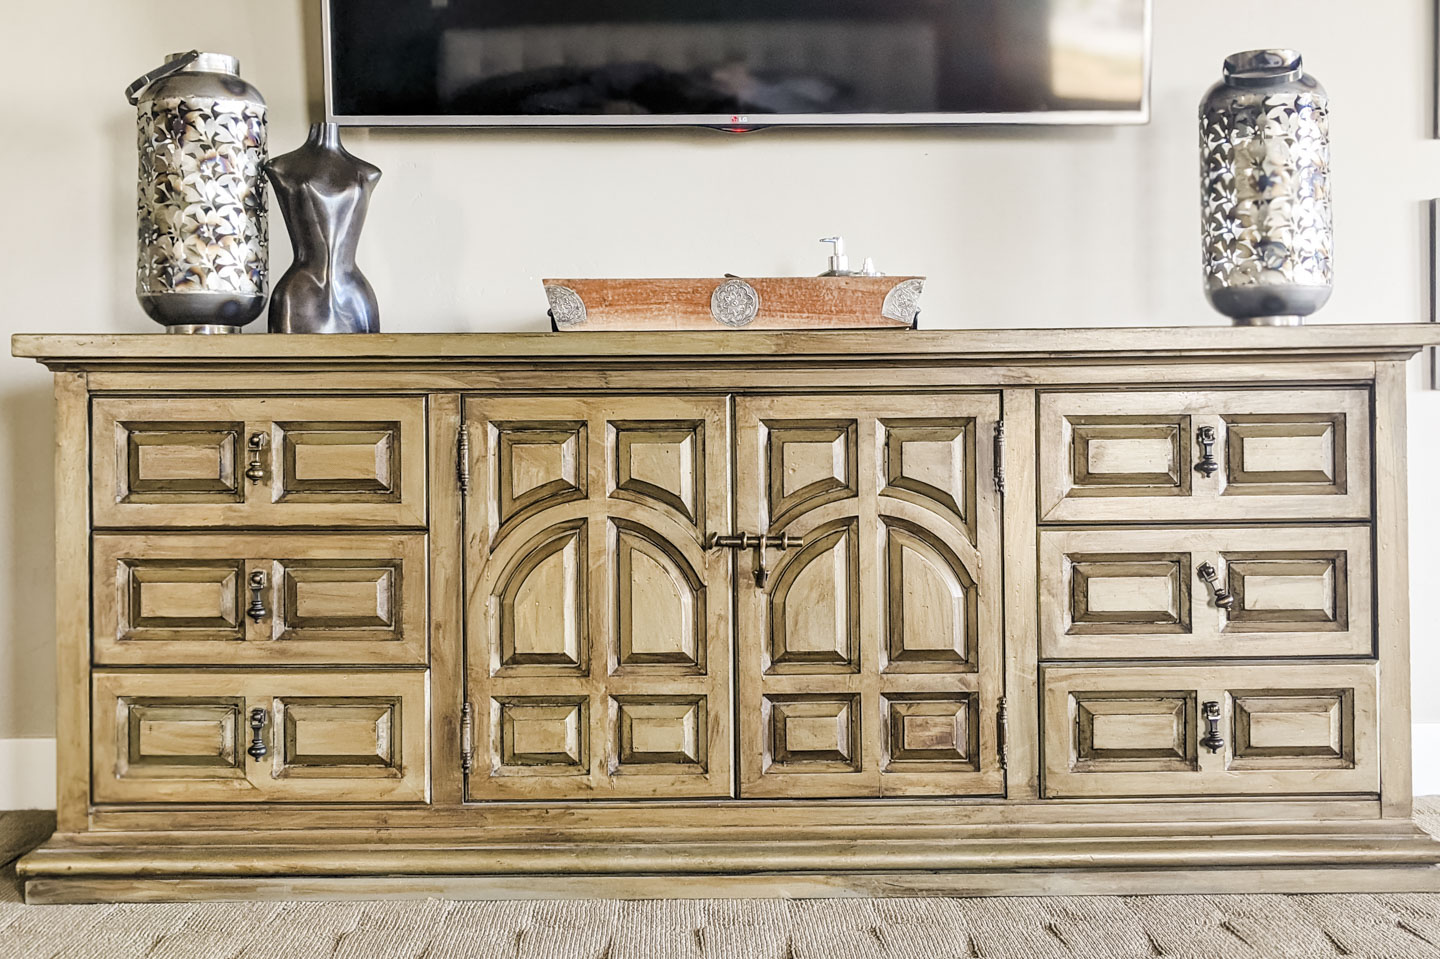
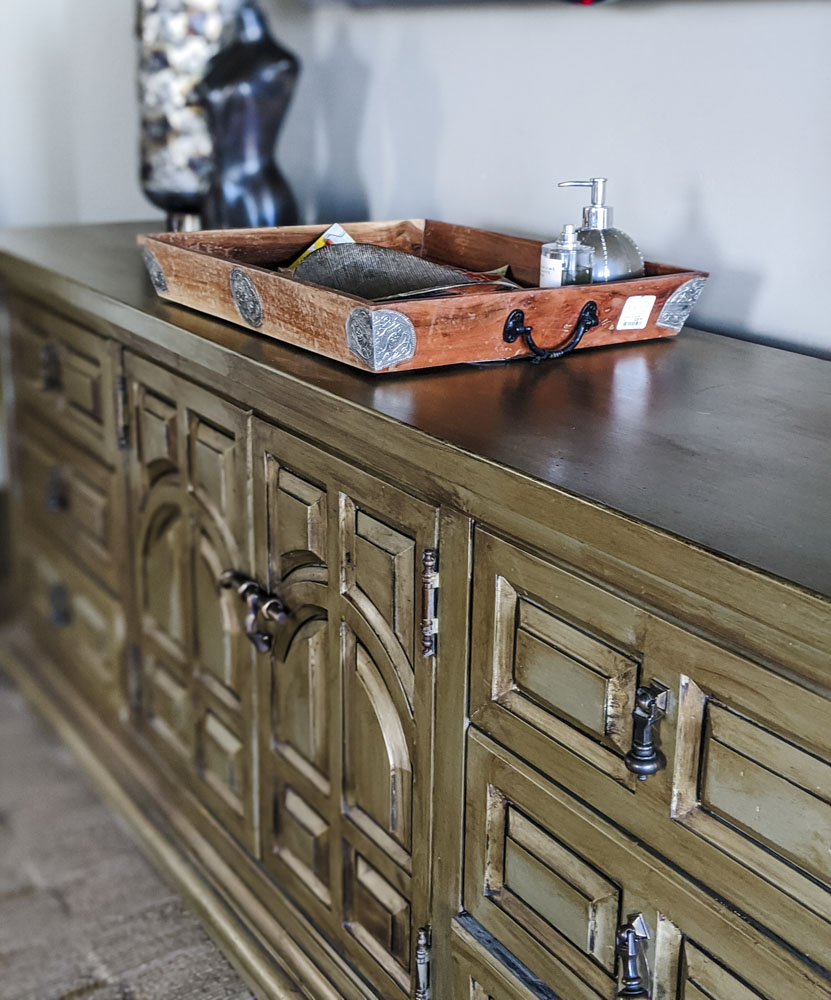
I think one of the best things about chalk paint is that you can find high-quality furniture with a dated look and to update it. This is a solid wood 70’s style console. I got creative on the console by adding a metallic glaze before waxing. Do not add any Plaster of Paris to the glaze or it will lose the shine.
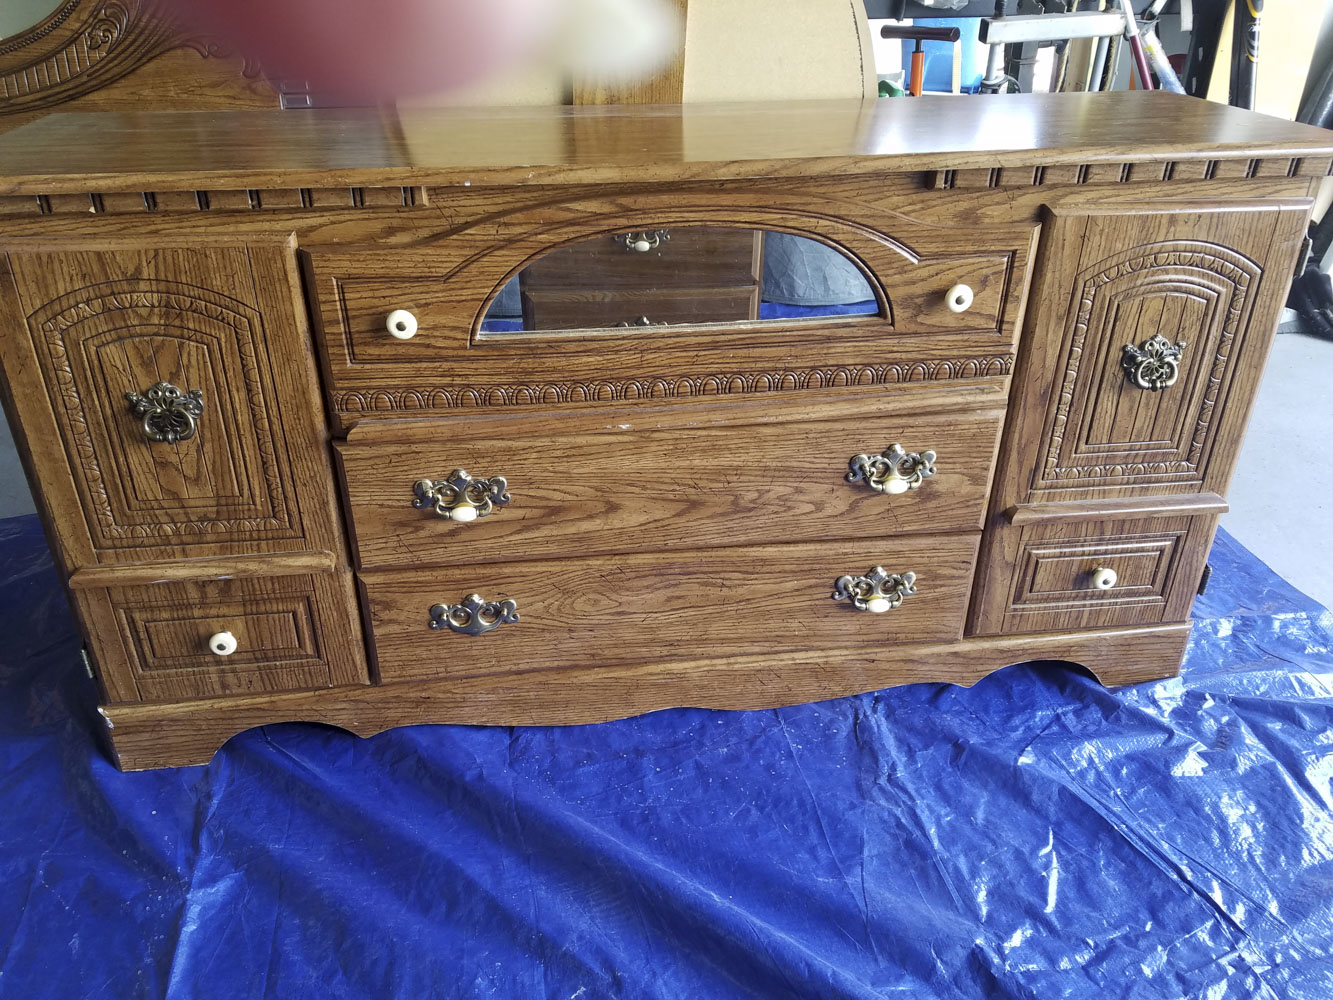
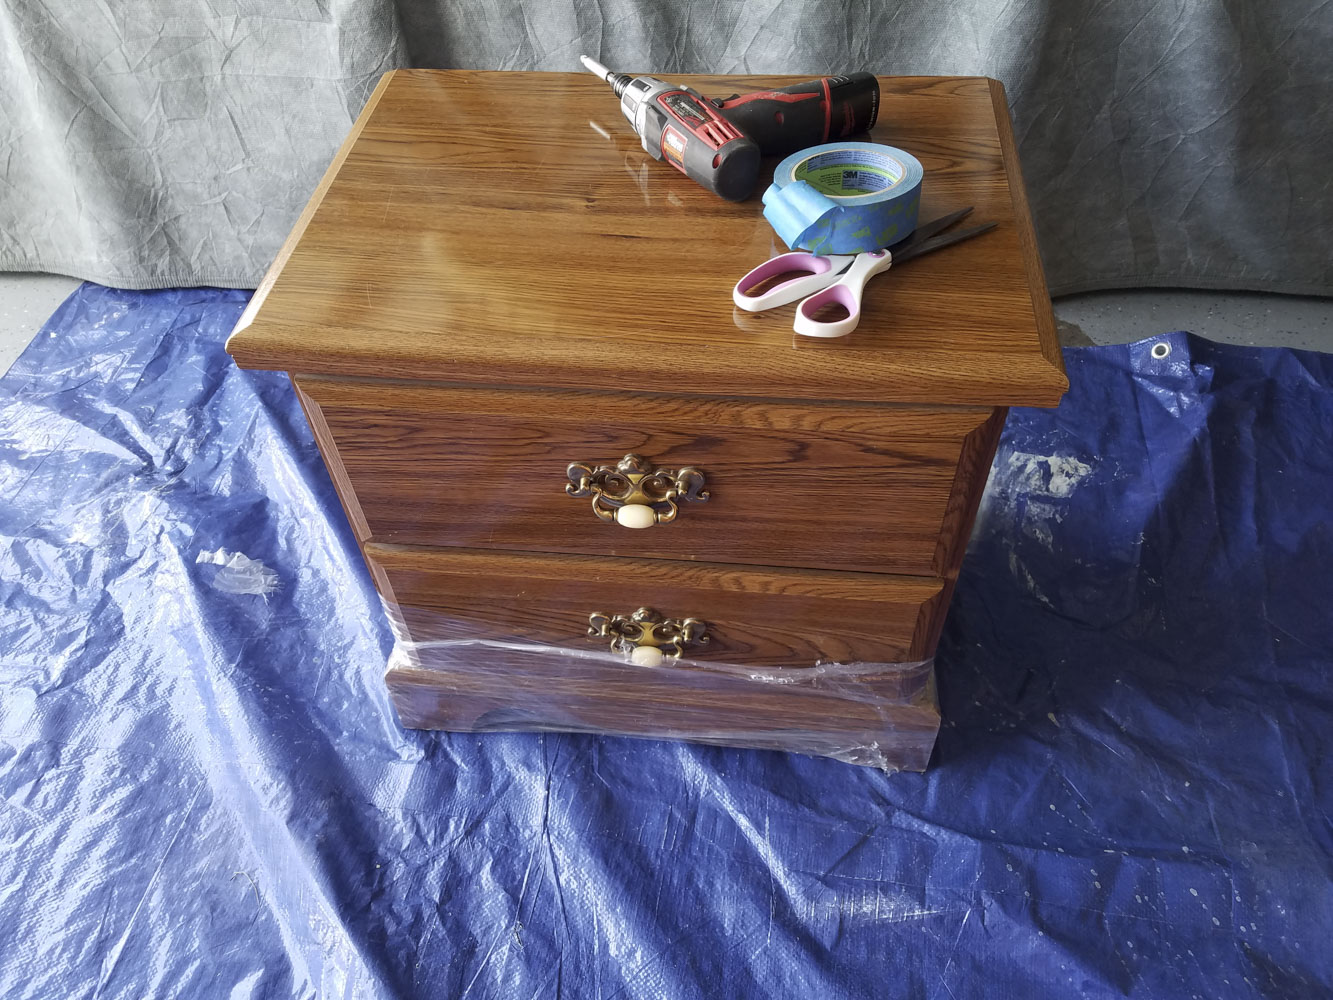
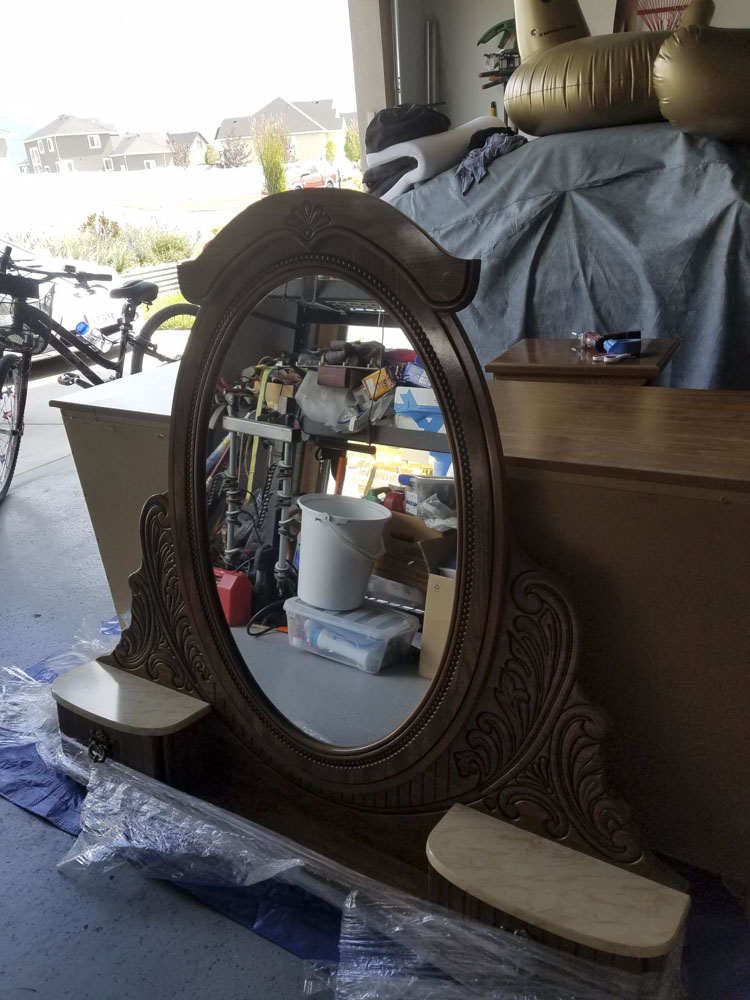
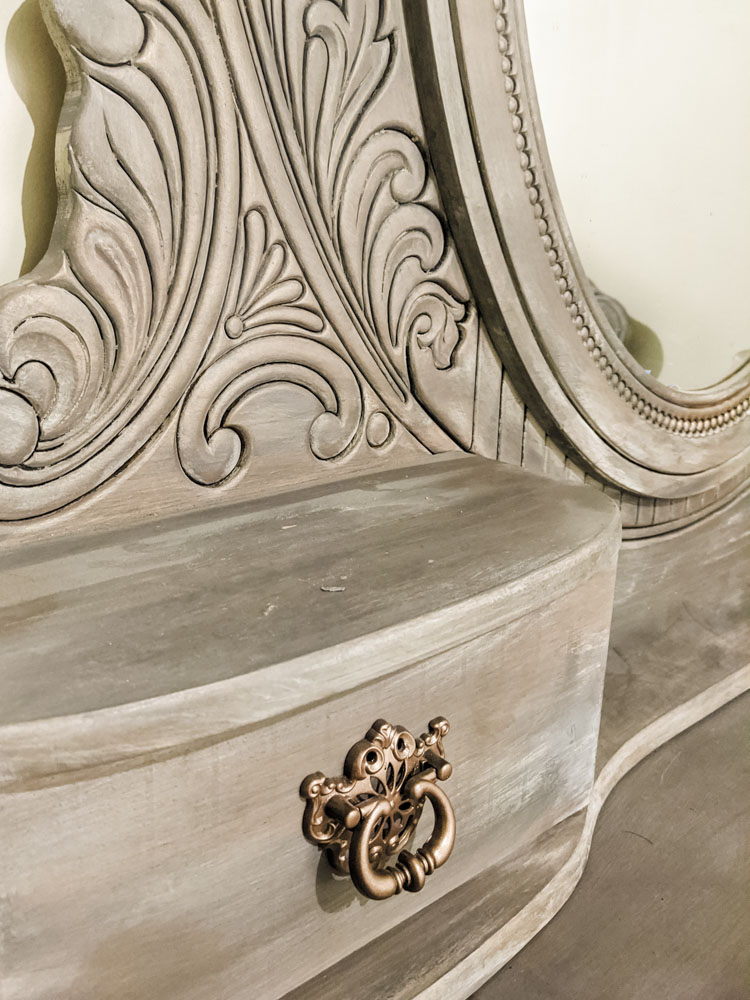
Thank you, Aunt Jill Atwood, for the bedroom furniture for our spare room. This is laminate furniture in an oak finish as a before.
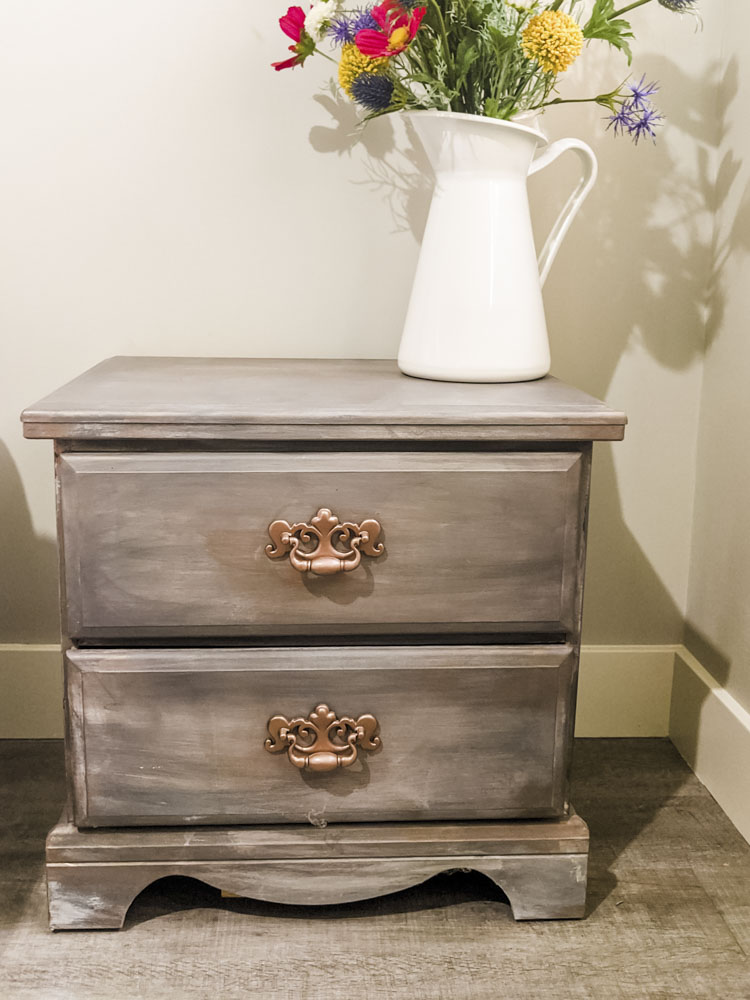
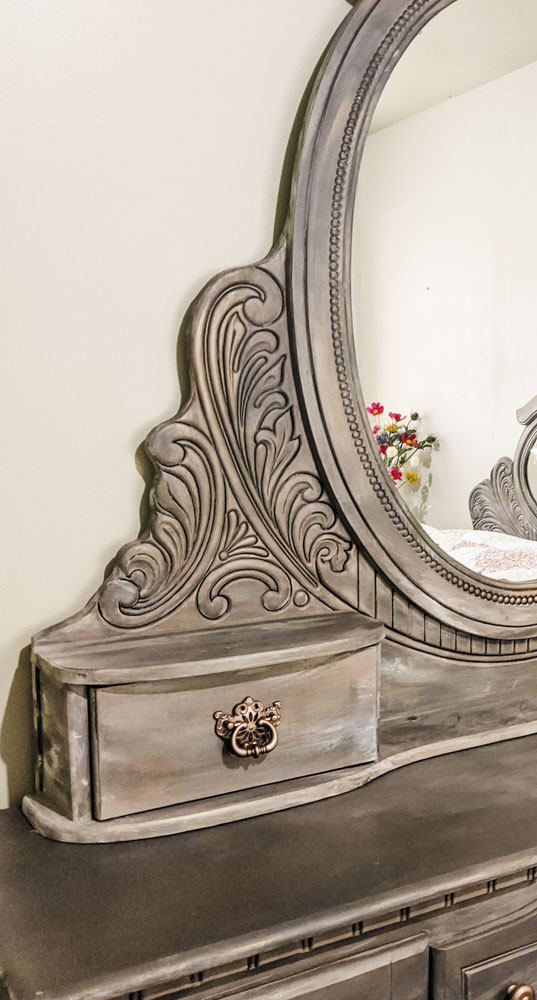
I loved the glaze we used on our bedroom console so I wanted to try a copper glaze on this project. We did a base with warm gray. To save money on the hardware we just sprayed the existing hardware copper.
Start Chalk Painting now:
Fair warning I did get a little obsessed with refinishing furniture for a while since I just adored the results of the first project. We went on to get more creative doing some more complex multi-color projects that I will share with you and even refinished some art pieces. The options with chalk paint are incredible since it adheres to almost anything. So there you go! Why, how, and what to chalk paint. So what is next? Make sure to download our Free Project Planning Guide to help you prepare for your chalk painting adventure.


Quality posts is the main to be a focus
for the viewers to pay a visit the web site, that’s what
this web site is providing.
Thanks, we try to share what we know.
Hey there! This is kind of off topic but I need some help from an established blog. Is it very difficult to set up your own blog? I’m not very techincal but I can figure things out pretty quick. I’m thinking about setting up my own but I’m not sure where to begin. Do you have any points or suggestions? Thanks