Joan Atwood -Artist| Educator | Crafter | Project Inspiration
I wish I could say that I’ve always been organized and could put my fingers on whatever I wanted in my house, but woe is me; it’s just simply not the case. Back when I was big-time into tole painting, about forty years ago or so, I decided to paint a small elementary school desk that my mother-in-law gave me when my kids were young. Her gift is what inspired me to start to restore antique kid’s desk.
Antique Desk Inspiration:
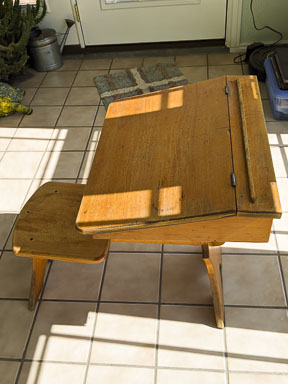
My husband Barry used the desk, 65, and before that, elementary school kids used it for many years. I removed the seat and transferred a pattern onto it. But then my life got busier, I went to work as a teacher and got involved in all my kid’s activities, and tole painting went by the way. I kept the little desk away in the basement, and I put the seat somewhere else. What was I thinking? In retirement, I decided to use some of my time working on my beloved crafting and artwork. I remembered the little desk and thought it would be great to pull it back out and work on it. I found the desk with no problem, but I could not find the seat anywhere.
The idea of cleaning the basement to find it was pretty overwhelming. (You can fill up a space given 30 years living in the same place and having kids and grandkids storing their stuff.) But I decided to tackle it a little at a time. That finally paid off. I found the seat on a shelf with other items stacked on top of it. Boy, was it hidden. I decided to revive the cute little desk with renewed hope but keep the years of use evident. It would be perfect for Lily at the age of three.

Restoration Supplies:
- Small wooden school desk (KSL and eBay are great sources to explore)
- Variety of acrylic paints and brushes
- Sand block sponge
- Paper plate or palate paper
- Cup of water
- Drop cloth
- Paper towels
- Tole painting patterns (it’s helpful to have a how-to tole paint book if you’re a beginner).
- Transfer paper
- UV-Resistant clear acrylic coating spray can (I used Krylon because it is non-yellowing)
How-to Restore Antique Kid’s Desk:
How-to steps:
How-to Restore Antique Kid’s Desk:
- I began the process of reviving the desk by giving it a good cleaning.
- Then I sanded the top of the desk with a sanding sponge just enough to make it a little less rough. I wanted to keep as much of the years of use as possible.
- I then began to tole-paint the long-forgotten seat, using my stash of acrylic paints.
- Use your drop cloth to cover the floor in the area you are using.
- Clean the desk with soap and water and dry it right away.
- Sand the areas that need it but don’t try to make it perfect. Remember, it isn’t new.
- Use the transfer paper to put the tole painting pattern on the desired area you want to paint.
- Begin painting in the center of the pattern and work your way out. I took breaks to allow the paint to dry when necessary. Look up how to do strokes for painting if this is your first endeavor. (See Restoration Tutorial ) Double load your brush to do sections you want blended. Double loading a paintbrush means that you put one color on one side of your brush and another color on your brush’s other side. Then stroke your palette or paper plated before applying.
- After painting the sections you want, allow the paint to dry overnight.
- You can then apply the clear acrylic coating spray using a light mist and let it dry and apply again. I used three coats.
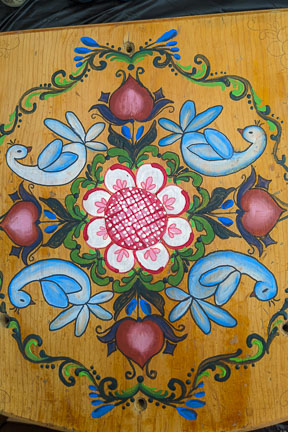
- I didn’t have a pattern to use on the top of the desk, so I free-handed a similar flower and leaves to add a little interest to the desk and tie everything in.


Finished Restoration:
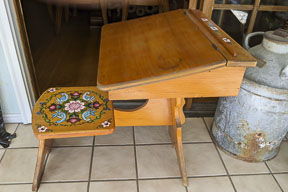
I have to admit. It is not perfect since, as I have aged, I have developed a bit of a hand tremor. So, the moral of this story is, don’t wait too long to finish your projects. I wish I would have stuck to my tole painting; I would be quite a bit better now, and my children would have enjoyed the cute little desk. You never know what the future holds, so don’t put your life on hold for a better time to do things. There are no guarantees that you will find your projects or have the time to do them later. I guess I just lucked out. Lily uses this desk daily to store and work on her projects daily she loves that Grandma Joan restored this antique desk.

More Lilies and Jets:
How-to restore a child’s antique chair
To keep up on all our projects, remember to follow us on Pinterest. Don’t forget to subscribe to our email list to get your Free Project Evaluation Checklist and to hear about our latest projects. We can’t wait to see your version of this project. Please post them in the comments or send us an email.
About the author:

Joan inherited this family heirloom children’s desk. If you’re lucky enough to find one of these in an antique shop you should grab it today. See the process Joan used to restore this antique desk and don’t be afraid to try something similar on another desk style.


+ show Comments
- Hide Comments
add a comment